Virtual Conversion
Virtual Conversion is provided to convert a backup or a physical disk to a virtual disk or virtual machine on a VMware, Microsoft Hyper-V host, KVM or Proxmox.
Cloud Edition does not provide this feature.
Virtual conversion of a Linux system is not supported.
Virtual conversion to virtual machine on Proxmox does not support [Create virtual disk only] option.
Conversion from Backup Image
Step 1 : Select a Source
Select [Convert Type] and a source image.
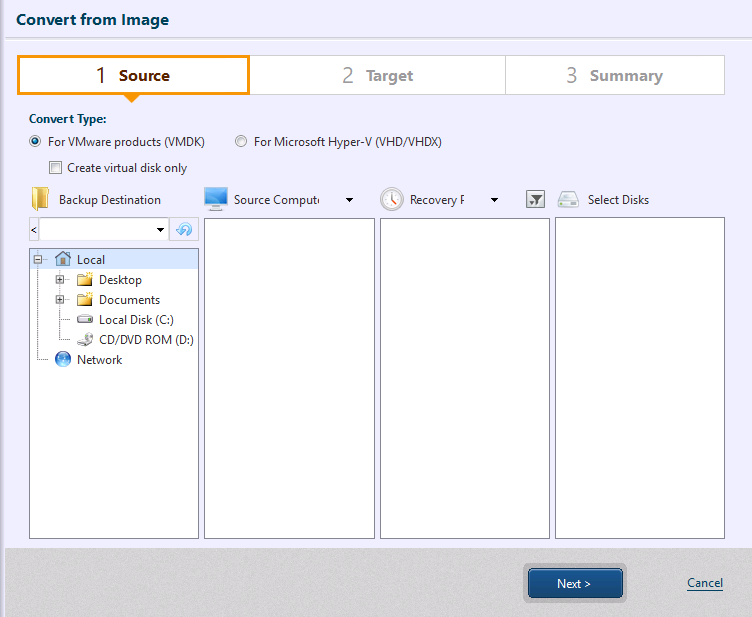
Select the convert type, the location of the conversion source backup, computer, recovery point, conversion target disk. If creating a virtual disk instead of a virtual machine, please check the [Create virtual disk only] option.
Backups in tape pool, SFTP and cloud storage are not supported.
The agentless backups created by using HyperBack are not supported.
Backups of a Windows OS created on Linux-based boot environment is supported, however, the virtual machine and virtual hard disk created as a result does not include installation of the drivers.
After configuration of the settings is complete, click on [Next >].
Step 2 : Select Destination
Specify the destination. Available destinations and the settings should differ depending on the conversion type selected above.
For further details about the settings, please refer here.
Step 3 : Virtual Conversion Summary
Please review the settings for virtual conversion.
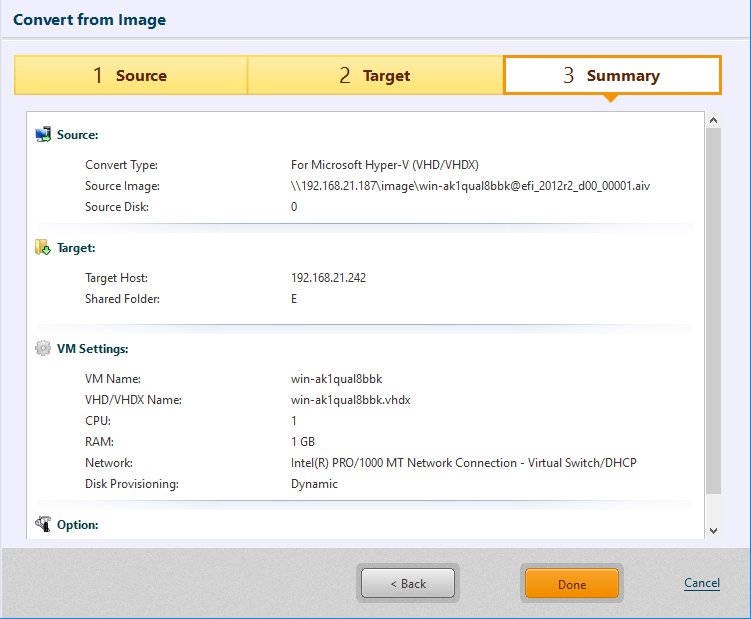
Click [Done] to proceed with the conversion.
If you selected Thick Provisioning for Disk Provisioning (Disk Type) or Static, it takes more time before starting the task as the virtual disk is created as the same size as the conversion source disk.
After conversion to CSVFS volumes, please visit here for the detailed procedures required on the conversion target cluster node.
Virtual Conversion is provided to convert a backup image to a virtual disk or virtual machine.
Conversion of a Physical Disk
Step 1 : Select a Source
Select [Convert Type] and a source disk.
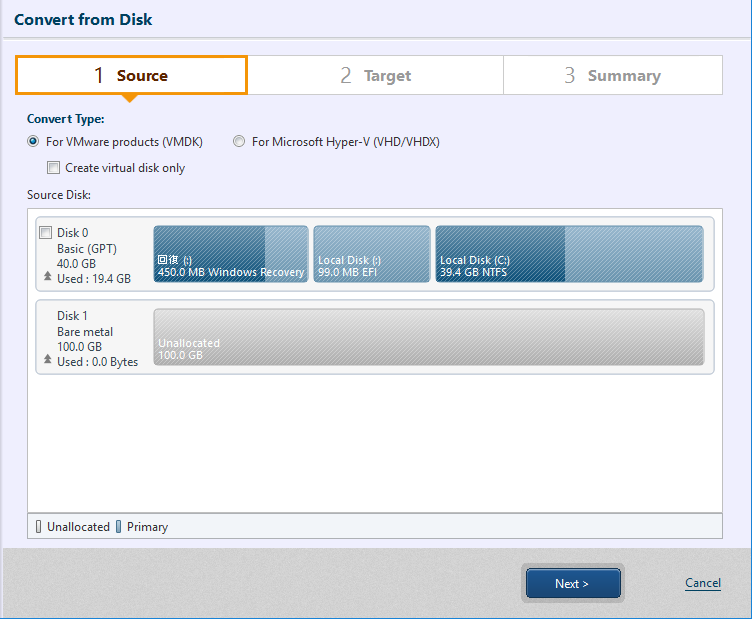
Please select [Convert Type] and specify the conversion source disk. If creating a virtual disk instead of a virtual machine, please check the [Create virtual disk only] option.
Virtual conversion of a Linux system is not supported.
Upon completion of configuring the settings, click [Next>].
Step 2 : Select Destination
Specify the destination host. Available destination and the settings should differ depending on the Convert Type selected above.
For further details about the settings, please refer here.
Step 3 : Virtual Conversion Summary
Please review the settings for virtual conversion.
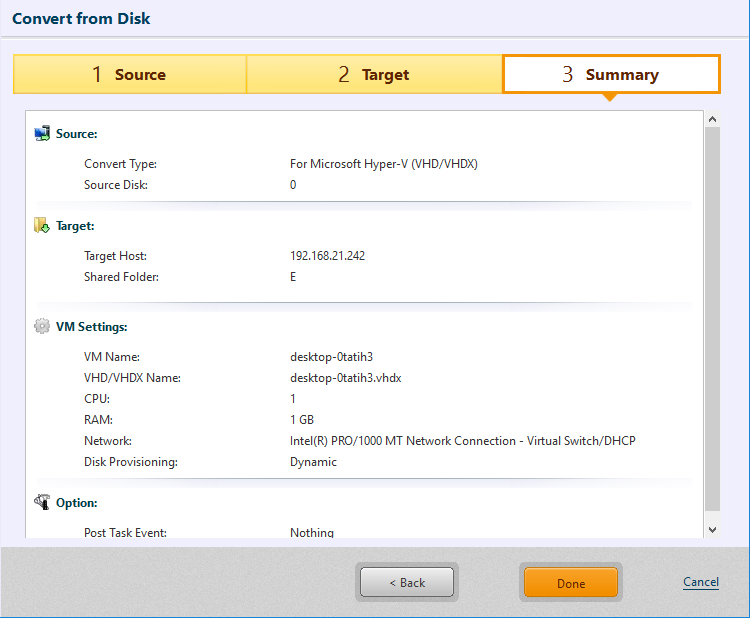
Click [Done] to proceed with the conversion process.
If selecting Thick Provisioning for Disk Provisioning (disk type) or Static, it takes more time before starting the task as the virtual disk is created in the same size as the source disk.
After virtual conversion to CSVFS volumes, please visit here for the detailed procedures required on the conversion target cluster node.
Virtual Conversion is provided to convert the disk connected to the system.
Virtualization Adapter
-
Specify the recovery point to add the virtualization driver.
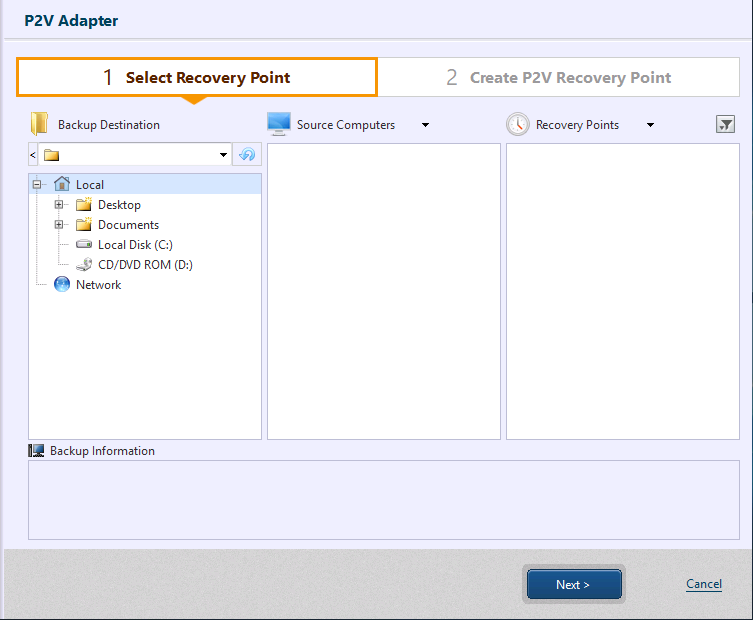
-
Select the hypervisor type to use the newly created recovery point and configure the setting. Click [Create].
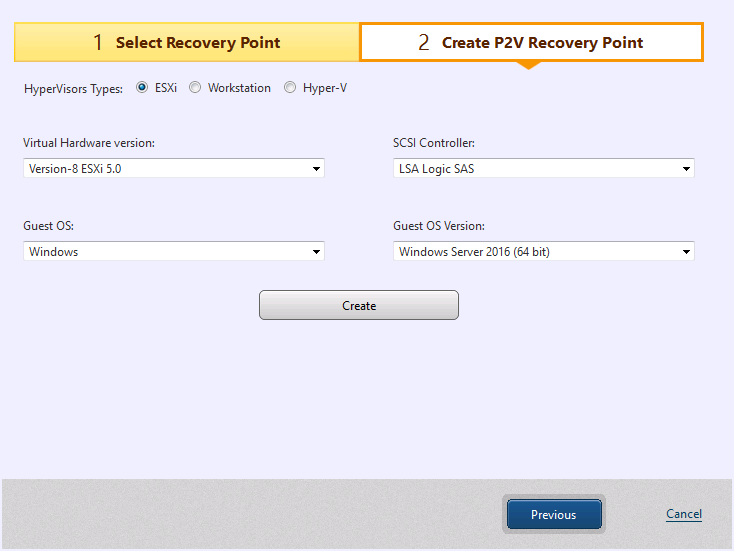
A new recovery point is created as a differential backup (.aix) in the destination storage saving the recovery point.
When adding virtualization driver, a new recovery point (differential backup) can be created.
The backup files saved in tape device or cloud storage are not supported.