Image Manager
These tools provide a number of options that provide efficient management of backups.
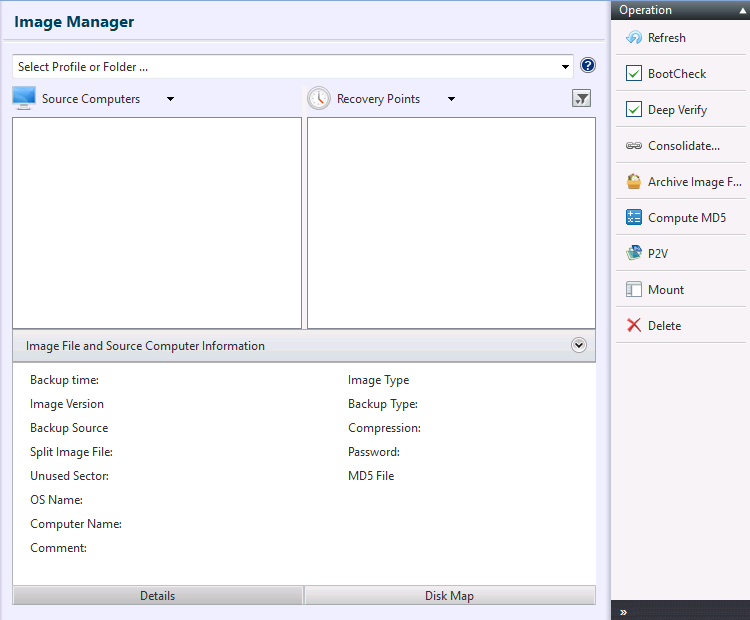
The recovery points appearing in bold type are base backups.
When executing a task, login to Azure as authentication is required for accessing Azure Blob storage and selecting a backup.
Image Manager does not support the use of backups saved on tape device.
Cloud Server does not provide BootCheck and virtualization features.
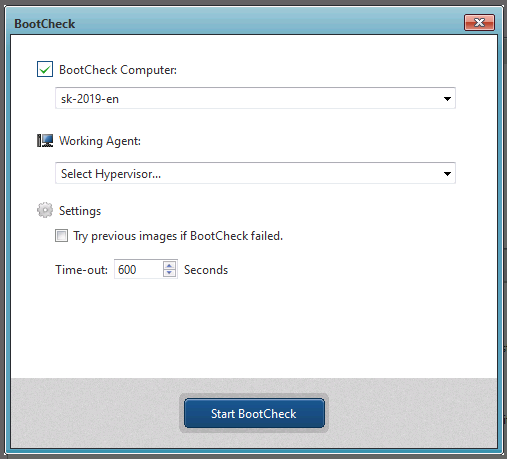
BootCheck
BootCheck uses the following hypervisors.
- Microsoft Hyper-V: Windows Server 2012 or later
The BootCheck process uses 1024 MB of memory on a hypervisor.
BootCheck does not support systems where the boot and system partitions are configured on separate disks.
-
Computer running BootCheck
When running BootCheck for a HyperBack backup of multiple virtual machines, please select one virtual machine included in the backup and specify its OS. -
Working Agent Specify a hypervisor for running the BootCheck process.
BootCheck on Windows 10, 11 supports only Hyper-V on the local host.
When using [Hypervisor on other host], please configure your firewall to allow File and Printer sharing, and Windows Management Interface (WMI).
-
Setting
-
Try previous image if BootCheck fails If BootCheck failed for an incremental backup, BootCheck runs for the backup created prior to the failed one.
-
Time-out xx seconds
Specify the maximum time to wait for a backup to complete the BootCheck process.
-
Click [Start BootCheck] to start the process and the status will be displayed.
Click [Cancel] to terminate the processing.
BootCheck tests if the specified backup can successfully boot as virtual machines on hypervisor on a specified host.
BootCheck does not support backups saved in cloud storage or SFTP.
Quick Verify
Select the backup to verify and click [Quick Verify].
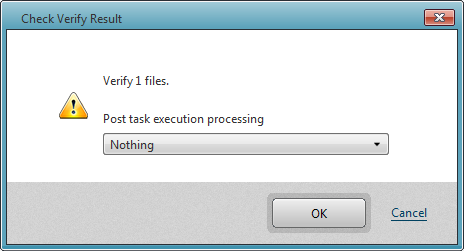
Choices included are [Reboot] or [Shutdown] once the integrity of the backup is verified. Select [Reboot] or [Shutdown] from the pull-down list and click [OK] button.
The Quick Verify task runs for the same process as when the backup image file was created.
This menu item is displayed only when a backup image created by using Version 2022 is selected to use.
Quick Verify does not support the backup files created by using 7.0.1 or earlier Versions and saved in Actiphy ImageCenter (StorageServer).
Deep Verify
Select the backup to verify and click [Deep Verify].
Choices included are [Reboot] or [Shutdown] once the integrity of the backup is verified. Select [Reboot] or [Shutdown] from the pull-down list and click [OK] button.
Deep Verify verifies the integrity of the backups.
Consolidate Backups
Hold down the SHIFT/CTRL key and click on the start and end of the highlight incremental backups to consolidate and click [Consolidate…].

The summary displays the number of files selected and the total output size of the consolidated file.
-
Options
-
Keep original image files By default, the original backups will be deleted after the consolidated file is created. Check this box to retain the original files.
-
Compute MD5 Check this box to create an MD5 checksum file for the consolidated backups.
-
Execution Priority Depending on the number of processes running in the system, adjust the execution priority for the consolidation process.
-
Post task execution processing - Choices included are [Reboot] or [Shutdown] once the consolidated file is created.
-
Click [Done].
Further reduce file clutter by combining both full baseline and incremental backups in the same generation and save the archived backup to a specified location.
Archive Backups
Select the end of the incremental backups to archive and click [Archive…].
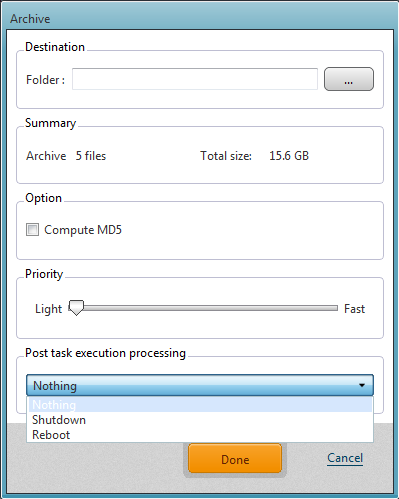
Displays the number of selected backups and the total output size of the archived backup. Depending on the total size, it is recommended to specify the destination to save the archived backup.
-
Option
-
Compute MD5
Creates an MD5 checksum file for the archived backup. -
Priority Depending on the number of processes running on the system, adjust the execution priority for the archiving process.
-
Post task execution processing Choices included are to [Reboot] or [Shutdown] once the archived file is created.
-
Click [Done].
When the selected backup has multiple recovery points, calculation of the total number and the size of backups takes time. Even before completing the calculation, the process can be executed.
When using a backup located in Wasabi, the process time may increase.
Reduce further file clutter by combining both full baseline and incremental backups in the same generation and save the archived backup in a specified location.
Compute MD5
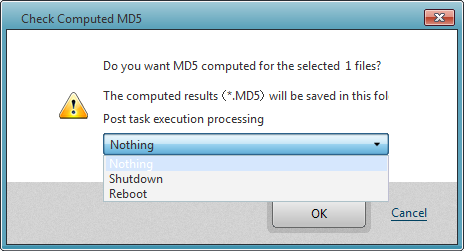
Choices included are [Reboot] or [Shutdown] once the process completes. Select [Reboot] or [Shutdown] from the pull-down list and click [OK] button.
Create an MD5 checksum for the selected backup. This can be used as a security measure to check if internal tampering of the backup has occurred in a copy of the backup.
Delete
Click [OK] to delete a base or incremental backup(s). Please keep in mind that this type of deletion cannot be undone.
When the backup file is password protected, you will be prompted to enter the password.
The specified file can be deleted.
Mount
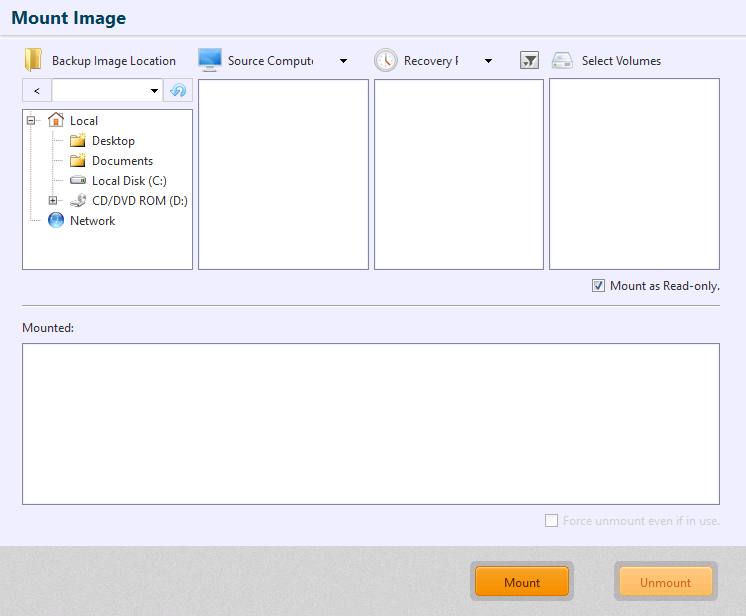
Mount Backup Image
-
Select the folder in which the backup file to mount is located, computer, recovery point and disk.
Agentless backups created by using HyperBack are not supported.
When the backup source of a backup image is basic disk, please select a disk. When using a backup file created by Volume Backup, the volumes not selected as backup source but included in the same disk are recognized as RAW by the system.
When the backup source of a backup image is a dynamic disk, please select a volume.
-
Click [Mount]. The backup is mounted as read-only when selecting the [Mount as Read-only] (by default) option. The backup can also be mounted as writable. The changes made to the backup are saved in a differential backup (.aix) after the volume is unmounted.
When mounted, a drive letter is automatically allocated.
When mounted but the volumes in the mounted image are not displayed in Windows Explorer, please click Update button.
Unmount Backup
-
Select a mount point to unmount from the [Mounted].
-
Click [Unmount]. The [Force Unmount Volume] option can be enabled so that the mounted backup, even if in use, can be unmounted.
The Mount Backup feature allows you to browse and copy files and folders from ActiveImage Protector.
The backups saved in tape device, cloud storage or Actiphy ImageCenter(StorageServer) are not supported.
Image Target Server
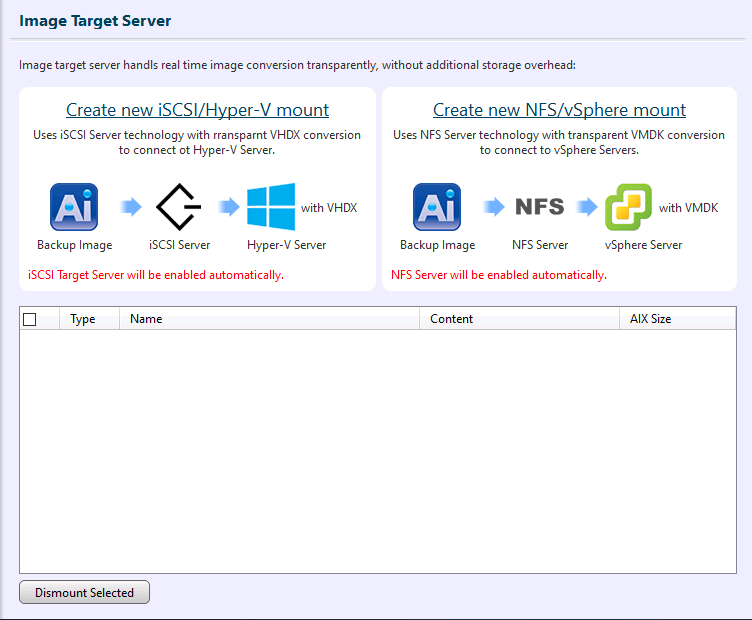
Please select the type.
-
When using iSCSI disk
Please select [Create new iSCSI / Hyper-V mount] option.
Select a recovery point of a computer and a disk from the destination storage of a backup, and click [Mount].
When connecting to a backup from a computer via a remote iSCSI initiator, the backup serves as iSCSI disk. Connecting the iSCSI disk to a new virtual machine on Hyper-V provides immediate booting of a backup attached to a virtual machine on hypervisor. Selecting [Migration] of Hyper-V enables you to seamlessly migrate live virtual machines booted from the iSCSI disk to a hypervisor in a production environment.
When finishing the use of the backup as iSCSI disk, please disconnect from iSCSI initiator.
If you get ‘The session cannot be logged out since a device on that session is currently being used’ message, go to [Disk Management], set the iSCSI disk to offline and try again.
-
When using an NFS share
Please select [Create new NFS / vSphere mount].
Select a recovery point of a computer and a disk from the destination storage of the backup, and click [Mount].
After mounting and when connecting as an NFS datastore from vSphere ESXi, etc., the backup serves as the datastore for the VMDK. Connecting the VMDK to a new virtual machine on VMWare vSphere, etc., provides immediate booting of a backup attached to a virtual machine on the hypervisor.
Selecting [Migration] of VMware vSphere vCenter enables you to seamlessly migrate the virtual machines.
When finishing the use of the backup as an NFS datastore, please click [Unmount the selected item].
ActiveImage Protector now utilizes iSCSI or NFS datastore to serve a backup as iSCSI targets or NFS datastore.
IT Pro does not provide this feature.
Windows 10, 11 is not supported. Desktop and Cloud Editions do not provide this feature.
Backups saved to a tape device, SFTP server, and cloud storage are not supported.