Installing / Uninstalling ActiveImage Protector
Installing ActiveImage Protector
-
Double-click Setup.exe and start the install wizard.
-
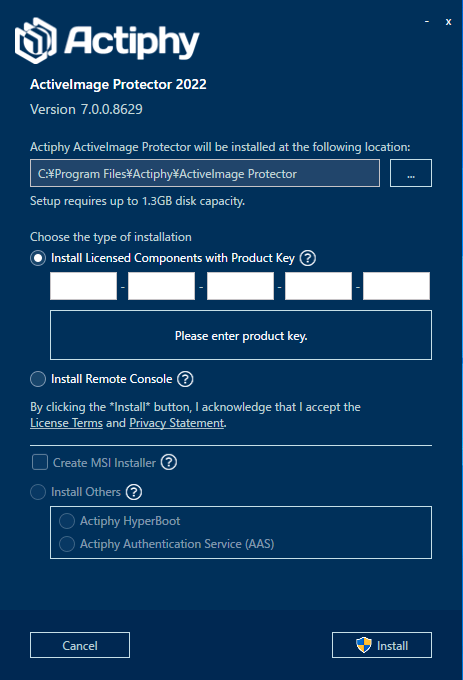
Select Install Type.
-
Enter the product key and install the licensed components. Select this option to install the backup agent. The respective components provide the following features.
-
Backup Engine and Agent
This component provides backup features on local computer.-
Image Mount Driver This component provides Mount feature enabling to mount backup image file to the system. Installation of this component provides [Mount Image] feature.
-
Tracking Driver
This component is provided to use Tracking Driver for tracking the changes from the last backup. If not installed, incremental backup task runs by using [Changed Block Comparison (CBC)] method. -
Console
This component enables to launch ActiveImage Protector console from Start menu or Desktop.
-
-
Image Explorer
This component provides the feature enabling to access the backed up data by double-clicking a backup image file.
-
-
Install remote console.
Select this option if accessing and operating a backup agent configured on a remote computer. -
Install the related products.
Select this option to install the related products.-
Actiphy HyperBoot
Instead of restoring from a backup, a virtual machine can be booted on a specified hypervisor. For more details, please refer here. -
Actiphy Authentication Service (AAS)
Actiphy Authentication Service can act as a Standalone Licensing server without requiring a persistent internet connection. For more details, please refer here.
-
-
-
Select the option and click [Install].
When creating an MSI file to distribute to a domain computer, enable [Create MSI Installer]. A product key is required to create the MSI file.
Please do not change the file name of the created MSI file which includes the product key.
Upgrading
-
Double-click Setup.exe and launch the installer.
-
Select Upgrade and click [Install].
-
When the process completes, click [Finish] to end upgrading.
Uninstall ActiveImage Protector
-
Go to Control Panel => Programs and Features and select [Uninstall or change a program].
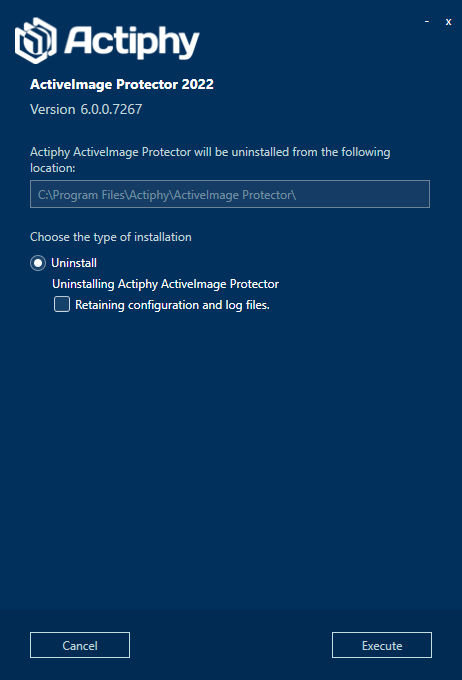
Enable the [Retaining configuration and log files] option to keep the settings and log files. Click [Uninstall] to start uninstallation.
-
Upon completion of the uninstall, click [Done].
Product Activation
Use one of the following procedures to activate the product.
- Use the License File
- Access the Actiphy Authentication Service (AAS)
- Access the Actiphy Activation Server and activate the product over network
To review activation status, go to [Help]- [License].
When product activation fails after installation, the backup and other operations does not complete due to a timeout.
Activation of Cluster Edition using the same product key succeeds only on nodes in the same cluster.
Activation of Virtual Edition using a guest key succeeds only on virtual machines on a hypervisor registered by selectinig [Preference] - [Hypervisor] for HyperAgent.
To specify AAS for license authentication, please run the following command.
aipcontrol config AASIP <ip>
Notes on License File
It is not recommended to use the license file for the product activation.
License activation via AAS or online activation is not supported when creating a license file and submitting an activation request from the agent installed on a remote computer using the same product key. In this case, create the license files for the respective computers on which agents are installed that the same product key is assigned. License file request URL is specific to the computer to use the license file.
Change Activation Key
Go to [Help]- [License] and check the current activation method.
-
Online Activation
Launch [Online Activation] dialog, enter the product key to change and click [Activation].
-
Actiphy Authentication Service (AAS)
Launch [Actiphy Authentication Service (AAS)] dialog, enter the product key to change and click [Activation].
-
Use the License File
Launch [Activation using license file] dialog and click [Unregister license file]. Please create license file again by using the new product key and register the product key.
Consuming Licenses
The product licenses are consumed as follows.
When the number of consumed licenses exceeds the number allocated to the product key, you have to deactivate the consumed license for online license authentication.
When license bundle and license file are created by split license, enter the license restore code at the respective issue sites to restore the license and recreate license bundle and license file by allocating the required number of licenses.
-
Server
Successful product activation does not consume the product license. When a backup (agent based backup) task is created, the product license is consumed.
When HyperBack (agentless backup) is created, the product license is consumed for the respective backup source virtual machines.- When consumed license exceeds available licenses
Delete or deactivate the other activated task. The deactivated tasks become invalid. The tasks created on remote computers will become invalid when activated on the computer.
- When consumed license exceeds available licenses
-
Virtual (HyperAgent)
Successful activation of a license does not consume available licenses. Registering a hypervisor by selecting [Preference] - [Hypervisor] consumes available licenses.-
The number of activated license exceeds available licenses The activated hypervisor has to be deactivated. The task configured for a deactivated hypervisor is disabled. The task on a remote computer becomes disabled when the product is deactivated on the computer.
The information of the registered hypervisor is not shared among agents installed with the same product key. When backing up virtual machines configured on the same hypervisor, the information of the hypervisor needs to be registered for the respective agents.
The registered hypervisor on which the HyperBack task source virtual machine created on local computer, if deleted by selecting [Environmental Information] - [Hypervisor], is not deleted from online authentication server. When the HyperBack task is deleted, the registered hypervisor, is deleted from online authentication server and the license is recovered.
When registering cluster node on which Hyper-V is configured, or when registering ESXi host managed by VMware vCenter, you need to purchase the required licenses for the entire nodes and host. And you are recommended to register them as the source of HyperBack task. When only some of the nodes and hosts are registered, if a virtual machine is moved to another node or host, HyperBack task will be disabled at the next activation.
In order to enable the disabled task after the node and host are moved to another node or host, please use the following operating procedures.
1. Activate by selecting [License].
2. Go to [Preference] - [Hypervisor] and delete the registered node, host.
3. Register the moved node, host as HyperBack’s roll.
4. Go back to Dashboard and enable the disabled task.
Backup (agent-based backup) on a local computer consumes licenses in the order that the activation succeeds. When the number of consumed licenses reaches the number of available licenses, agent-based backup is disabled.
License file cannot be created.
-
- Cluster
Successful activation of a license consumes available licenses. Product activation can be performed only on cluster node.- The number of activated license exceeds available licenses
Deactivation is required on other nodes.
The task configured for a deactivated node is disabled at the upcoming activation.
When using product key for Cluster Edition, the same activation procedures have to be taken on the entirety of the nodes.
When using product key on nodes among which the license is activated on some nodes, the license can be activated on nodes in the same cluster.
When using the product on another cluster, you need to deactivate the license on the currently activated cluster. Please click the checkbox for the entire cluster to deactivate the license. - The number of activated license exceeds available licenses
- Desktop/Cloud
Successful activation of a license consumes available licenses.- The number of activated license exceeds available licenses
You need to deactivate license for other computer. The deactivated task on computer becomes disabled at the upcoming activation.
When creating a license file, please assign 1 license to the license file. Even if more than 2 licenses are assigned, they cannot be used for other environment.
- The number of activated license exceeds available licenses
Deactivating a license
-
When the number of activations allowed for the same product key are entirely consumed, the following pop-up message will be displayed.

When deactivating a license on another host and activate the license on this host, please click [Yes].
-
The list of the hosts on which a license is activated with the same product key is displayed.

Please select the host to deactivate a license, please click [Deactivate].
- When using a guest key of Virtual Edition, please deactivate the number of licenses exceeding the limit for a hypervisor as stated in your license certificate.
-
Successful activation is displayed.

Click [OK].
Before Using ActiveImage Protector
After installing ActiveImage Protector, it is recommended to create and ensure that the ActiveImage Protector Boot Environment boots up.
Use the following procedures to build the boot environment.
-
Build RescueBoot by using this product.
Boot environment based on Windows RE is built in system disk.
If Windows RE is not preloaded in the system, please install Windows ADK to build boot environment.
Please use the following operating procedures.
-
Go to [Dashboard] - [System Health Status] and click [RescueBoot] switch.
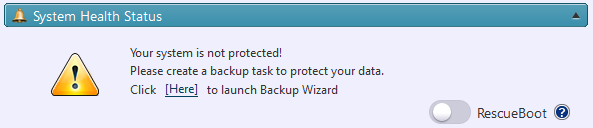
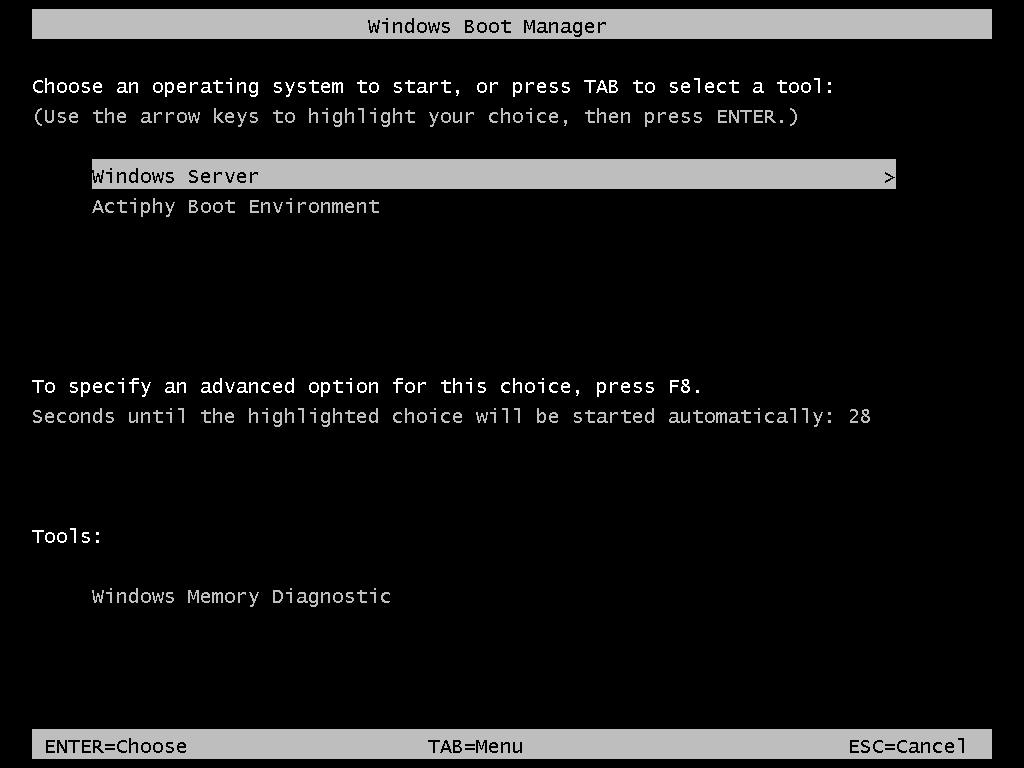
When boot environment is successfully built, the switch is indicated in green. After boot environment is built, Windows Boot Manager is indicated. Select [Actiphy Boot Environment] to boot up.
To disable the boot setting for the boot environment, click the switch. The switch color will gray out and the Windows Boot Manager will not be displayed when the system boots up.
-
Run [Boot up RescueBoot] by selecting the icon in Notification area
The system is automatically rebooted and boot environment boots up.
VNC viewer is provided to remotely operate the RescueBoot boot environment.
When a network adapter or a storage is not available to use, please use the following operating procedures to add a driver for a device and build the boot environment.
- Go to [Preference] - [Boot Environment Setting], add a required driver and rebuild boot environment.
- Go to [Utilities] - [Driver Loader], load a required device driver and build boot environment.
This feature is not available in the IT Pro Edition.
When building boot environment based on Windows ADK, you are recommended to use the version corresponding to your Windows version.
When connecting to the boot environment built on the instance on cloud, allow the inbound rules for security group which the instance uses or allow TCP port 5900 with the network’s receiving port rules,then specify Public IPv4 address via VNC Viewer.
When the computer name or IP address is changed after updating the product or building RescueBoot, please disable the switch then enable again and rebuild RescueBoot again.
-
-
Boot Environment on bootable media
Create a boot environment as an ISO file or on a USB device.
The Boot Environment Builder creates Windows-based and Linux-based boot environments using Windows RE or Windows ADK. A selected device driver may be embedded when building Windows-based boot environment media. For further details, please refer here.