In-Cloud Recovery
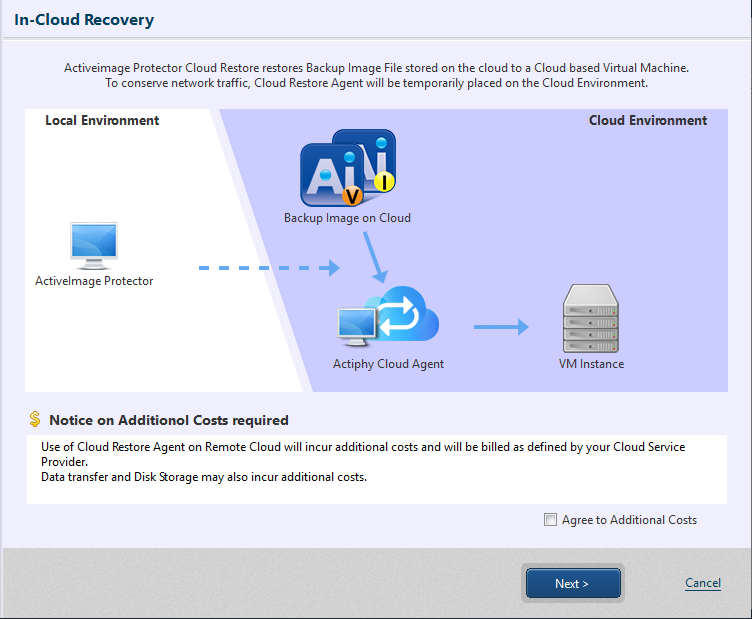
The In-Cloud Recovery feature restores a backup accessible from instance of Amazon Web Service (AWS), or Microsoft Azure as a virtual machine configured in the cloud environment. Additional costs by the use any of the cloud services may be incurred with the execution of this process and operation of the restored virtual machine. To proceed with further operation, please click the checkbox to [Agree to additional cost] and click [Next].
Desktop and Cluster editions do not provide this feature.
Restore to AWS
Step 1 : Connect
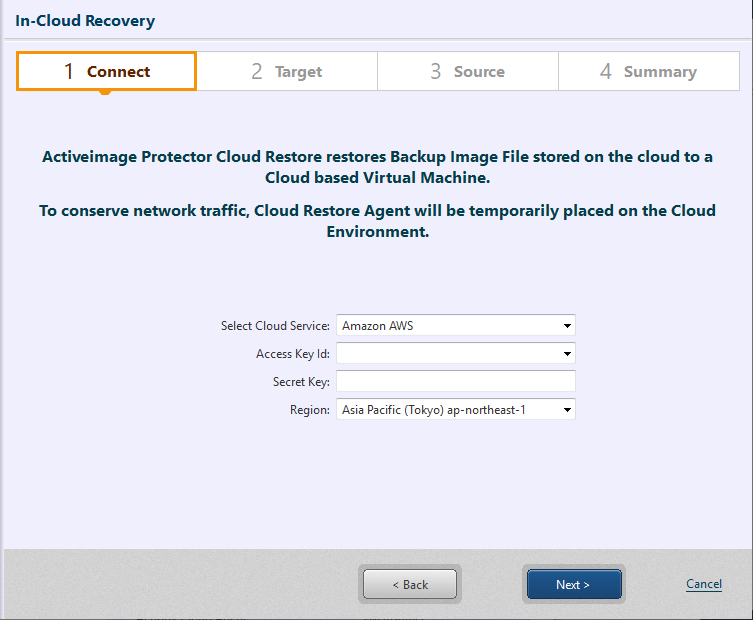
Select [Amazon AWS] and enter the credential information. Click [Next].
Step 2 : Recovery Setting
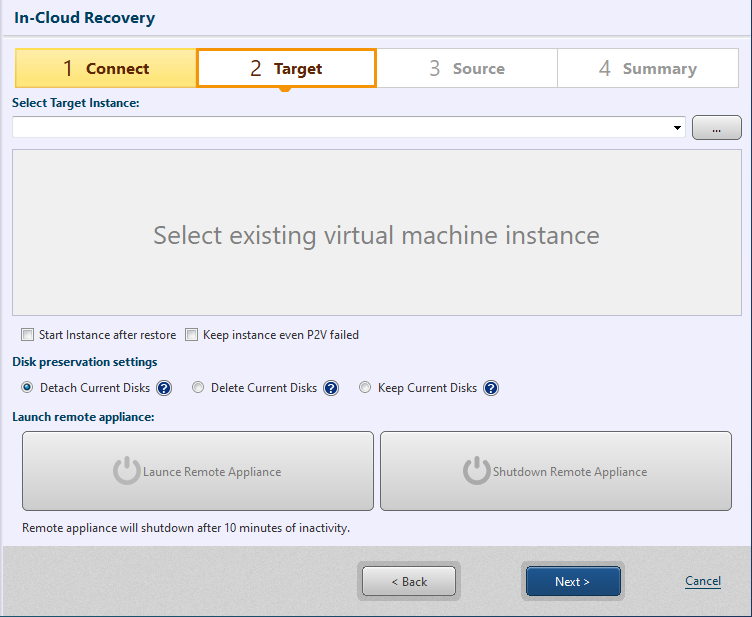
Click […] and specify the instance for the restore target. Please make sure that the instance is not running.
Only instances in the connected region are supported and can be selected for the restore target.
When restoring a backup of a computer on Amazon EC2, it is recommended to specify the backup source virtual machine as the restore target instance.
When restoring a backup of a computer on cloud environment other than Amazon EC2, please make sure that the instance of the restore target is prepared in advance.
-
Start the instance after the restore process
When restored, the instance is booted up. -
Even when virtualization fails, keep the instance
If virtualization fails when restored, the instance is deleted. Enabling this option keeps the instance instead of deleting should virtualization fail.
Enabling [Start Instance after restore] boots up the instance after restore process completes.
Disk preservation settings
Configure the option settings for the restored volume.
| Option | Contents |
|---|---|
| Detach Current disks | Detach the volume connected to the instance and connect the restored volume to the instance. The detached volume remains instead of being deleted. |
| Delete Current disks | Detach / delete the volume connected to the instance and connect the restored volume to the instance. |
| Keep Current disks | The volume connecting to the instance is not detached but additionally attached to the restored volume. |
Step 3 : Recovery Point
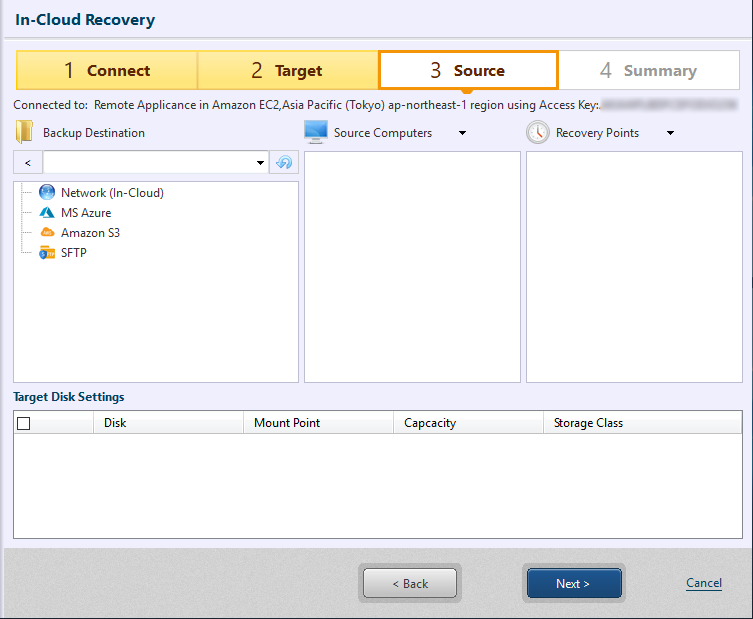
Please specify the folder on which the restore source backup file is located.
You are allowed to use the backup file accessible from the appliance booted in Step 2.
Before using backup files located in Wasabi, please select Amazon S3, go to [Enter Provider] - [Add New Target] and select Wasabi.
After the computer and recovery point are selected, the window is displayed for target disk setting.
Target disk settings
Please configure the settings for the volume to restore (size / type).
When restoring to a disk smaller than the minimum size of the selected storage type, it will be the minimum size of the selected storage type.
When restoring system disk, do not select [Cold HDD (sc1)].
Select the option and click [Next].
Step 4 : Summary
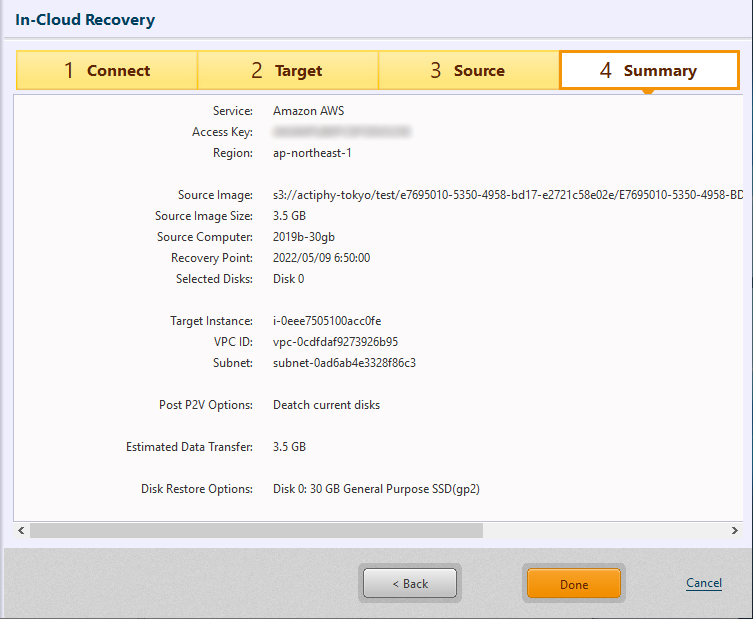
Use the Summary window to review the configured settings.
Click [Run] to start processing.
When the processing completes, boot up the restored instance from AWS Management Console, connect by using RDP or other tool and operate the instance.
When the instance is restored, the first boot-up of the instance automatically restarts the system. After reboot, remote desktop is supported for remote access.
When restoring from a backup of Windows 2008 R2 or earlier version system, optimum NIC driver is not installed.
The backup image is restored to the instance of Amazon EC2.
Restore to Azure
A global IP address is required to use the restore appliance. When the maximum number of the assigned IP addresses are already in use, the use of the restore appliance fails.
Step 1 : Connect
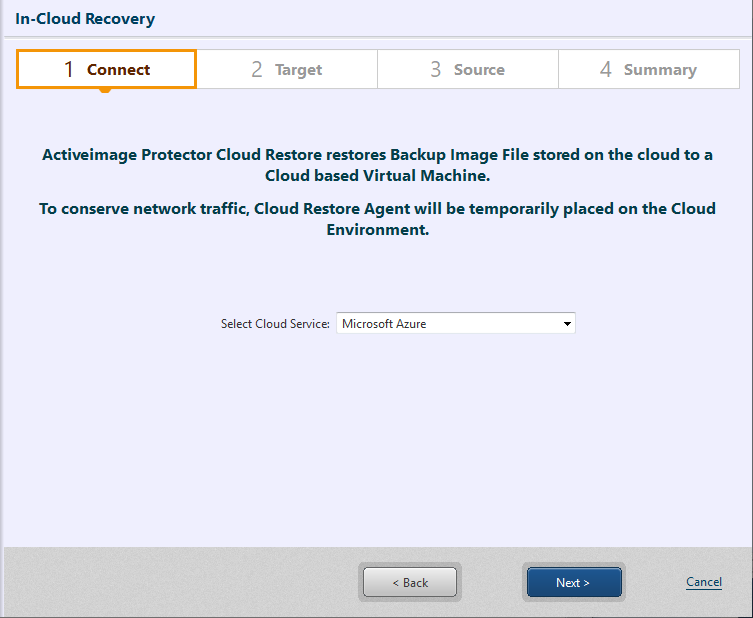
Select [Microsoft Azure], click [Next] to launch Web browser and log in Azure. When your log-in request is authenticated, you can proceed with the next step.
Step 2 : Recovery Setting
Click […] and specify the instance for the restore target. Please make sure that the instance is not running.
Only instances in the same region can be selected for the restore target. Only instances created by selecting [Standard] for [Security Group] are supported.
When restoring a backup of a computer on Azure, it is recommended to specify the backup source virtual machine as the restore target instance. When specifying a virtual machine from a different publisher as restore target instance, the restored virtual machine may not be powered on according to Azure’s requirements.
When restoring a backup of a computer on a cloud environment other than Azure, please make sure that the instance of the Microsoft-publisher restore target is prepared in advance.
-
Start instance after restore process
When restored, the instance is booted up. -
If virtualization fails, keep the instance
If virtualization fails when restored, the instance is deleted. Enabling this option keeps the instance instead of deleting even when virtualization fails.
Disk preservation settings
Configure the option settings for the restored volume.
| Option | Contents |
|---|---|
| Detach Current disks | Detach the volume connected to the instance and connect the restored volume to the instance. The detached volume remains instead of being deleted. |
| Delete Current disks | Detach / delete the volume connected to the instance and connect the restored volume to the instance. |
| Keep Current disks | The volume connected to the instance is not detached but additionally attached to the restored volume. |
Step 3 : Recovery Point
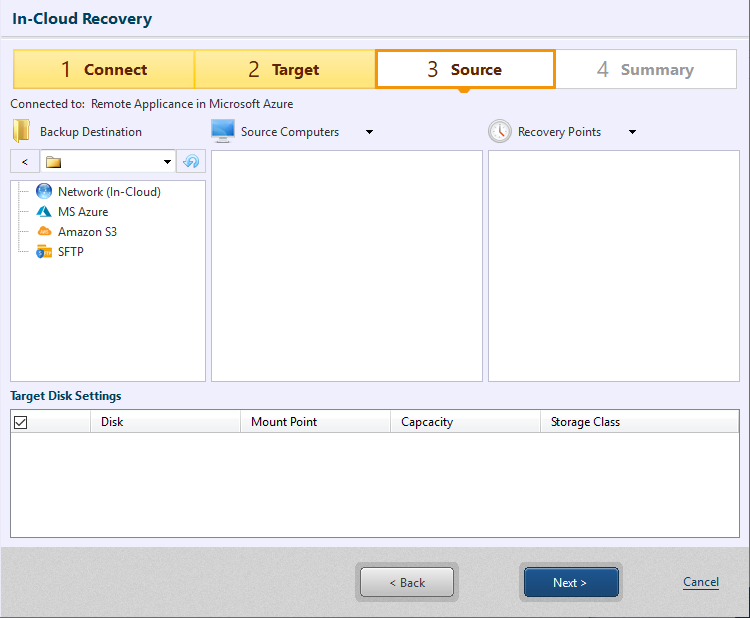
Please specify the folder in which the restore source backup file is located.
You are allowed to use the backup file accessible from the appliance booted in Step 2.
Before specifying a shared folder on an Azure instance, please establish the connection using the public IP.
After the computer and recovery point are selected, the window is displayed for target disk setting.
Target disk settings
Please configure the settings for the volume to restore (size / type).
When the disk included in the specified backup is smaller than the minimum size of the selected storage type, it will be the minimum size of the selected storage type.
When backing up the disk in which Azure VM’s Temporary Storage is located, please do not select the disk as the restore source.
Select the option and click [Next].
When restoring to a disk smaller than the minimum size of the selected storage type, it will be the minimum size of the selected storage type.
When backing up the disk in which Azure VM’s Temporary Storage is located, please do not select the disk as the restore source.
Step 4 : Summary
Use the Summary window to review the configured settings.
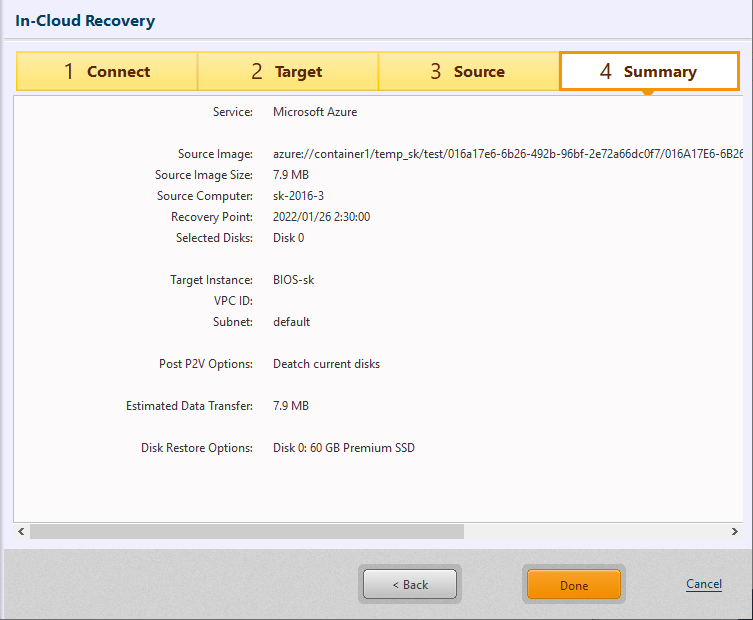
Click [Run] to start processing.
When the processing completes, boot up the restored instance from Azure Console, connect by using RDP or another tool to operate the instance.
When the Windows OS is restored in the instance, [AWSAgent] is added and enabled in Firewall, and communication to port 3389 for accessing remote desktop is allowed. If not configuring this setting, please disable or delete this setting after editing the configured setting.
Restore the backup to virtual machine on Azure.