Installing / Uninstalling ActiveImage Protector
Installing ActiveImage Protector
Before setting up ActiveImage Protector you need to install required packages. Using the script [AIP-packages-tool] facilitates installation of the required packages, drivers and ActiveImage Protector.
- For further details, please refer to [Tips] - Installation of the required packages and drivers for setting up ActiveImage Protector.
-
Set the product media in the media drive of the computer.
-
Run the script [AIP-packages-tool] located in root directory of the product media from terminal and install the agent, module and Kernel-devel required for setup.
- Change the user to super user if not root user and run the script [AIP-packages-tool] located in root directory of the product media from terminal.
# su
Enter password for root user
# < Mount point of the product media >/AIP-packages-tool -
Select [6] Install AIPLinux in [AIP-packages-tool] window, and the terminal window launches. Select [Install].
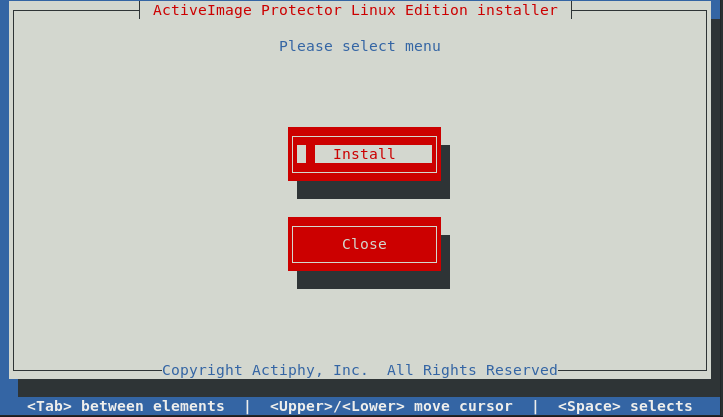
- The Terminal can be operated by keyboard only. Cursor movement can be controlled by using the Tab or Arrow keys. Use the Space or Enter keys to select an item.
-
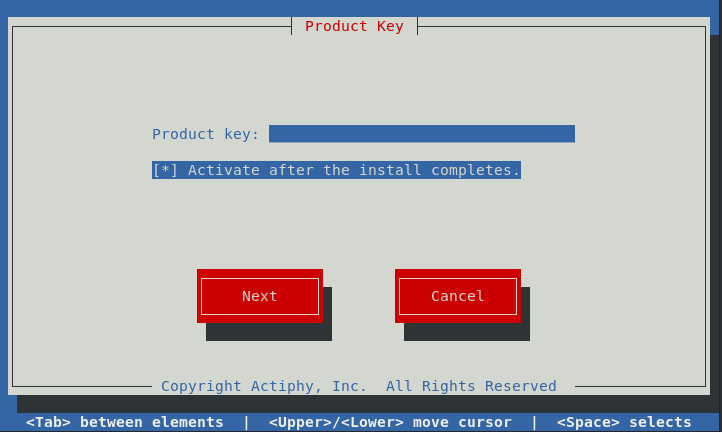
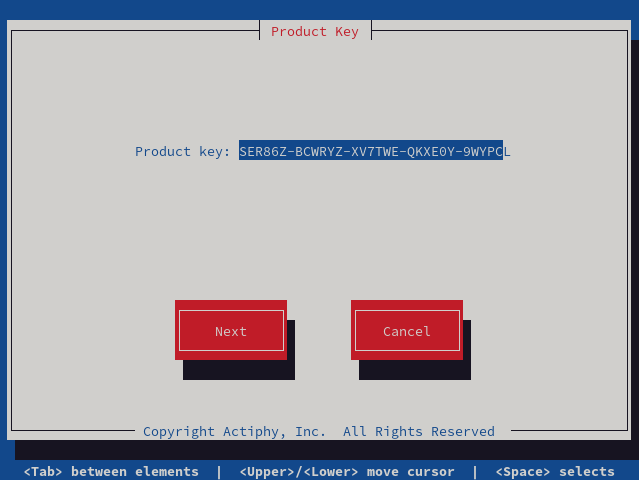
Enter the product key.
-
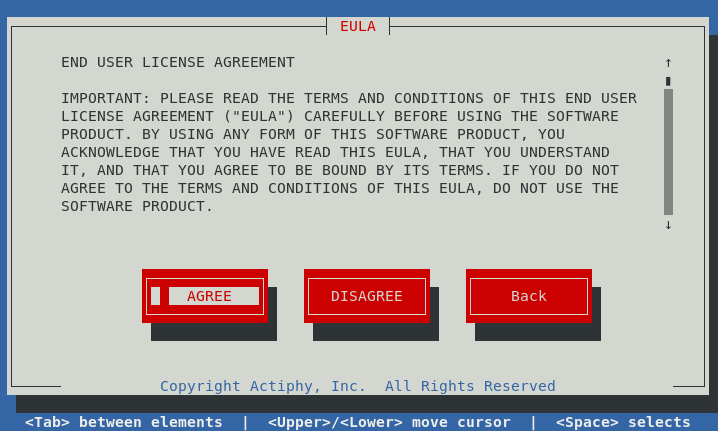
Read the End User License Agreement carefully and select [AGREE] to proceed with installation.
-
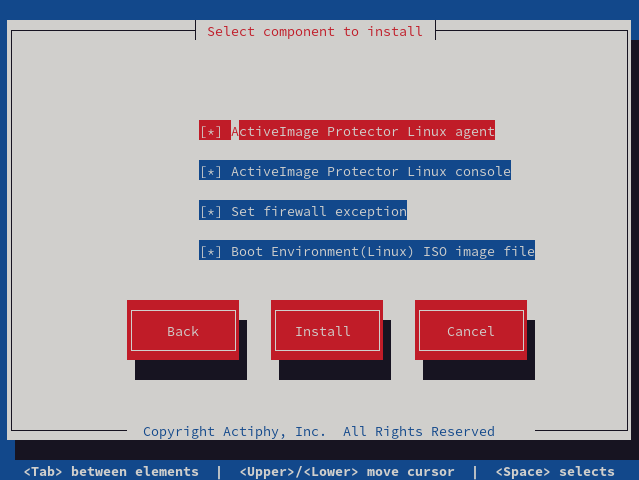
Select the components and options to install.
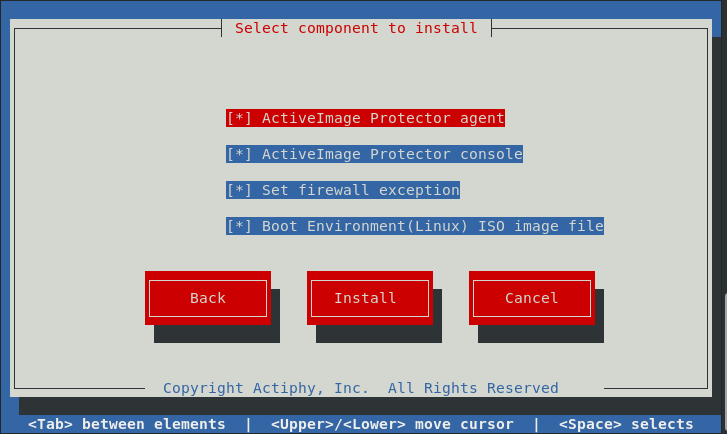
- Components
-
ActiveImage agent
The ActiveImage agent includes services, copy engine and drivers which are required for backup processing on the local host. -
ActiveImage console
The ActiveImage console (GUI) is used to access and operate ActiveImage agents on remote hosts over the network.
Only ActiveImage agent of this version (2022) is supported to access. ActiveImage agent of version 2018 is not supported to access.
To launch ActiveImage console, log in as the "root" user or a user belonging to "Wheel" group. To launch ActiveImage console as non-root user or a user other than "Wheel" group, run the following command from the terminal.
# sudo/opt/Actiphy/AIProtector
Password for root user -
- Option
-
Set firewall exception
Please check in the checkbox for "Set firewall exception" during installation of the product to automatically open the following ports:
TCP port 48236 (to connect to a remote computer)
UDP port 48238 (Agent local browse)
UDP port 48239 (browse agents on networked hosts)
UDP port 55238 (Actiphy Authentication Service activation server)
UDP port 55239 (Actiphy Authentication Service activation server) -
Boot Environment (Linux) ISO image file
Required to build RescueBoot or Linux BE.
-
- Components
-
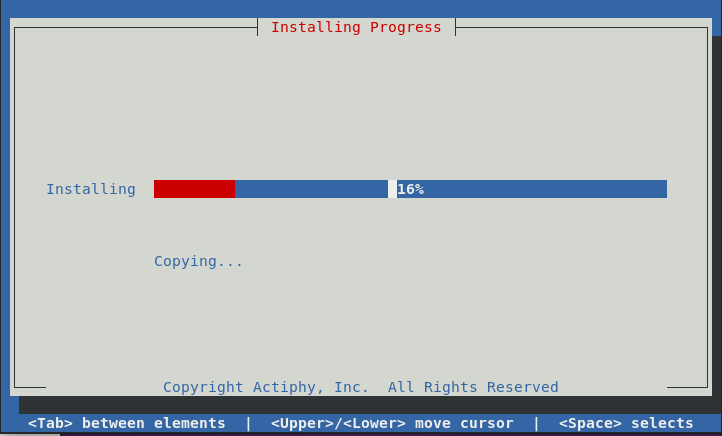
Installation progress is displayed.
-
The program is set up in "/opt/Actiphy" so that ActiveImage Protector service automatically starts when system boots up.
-
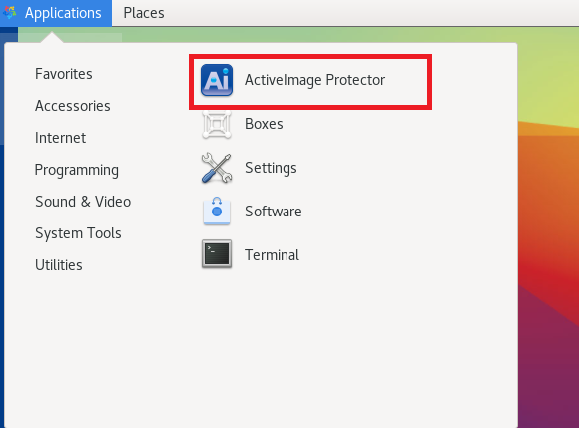
If the ActiveImage console is installed, select [Application] - [System Tools] to launch GUI.
Uninstalling ActiveImage Protector
-
Install ActiveImage Protector and select [6] Install AIPLinux in [AIP-packages-tool] window, and the terminal window launches to display Install window. Select [Uninstall].
- If not root user, log in as super user and run the script [AIP-packages-tool] on root directory in the product media in terminal.
# su
Enter password for root user.
# <Mount point in the product media>/AIP-packages-tool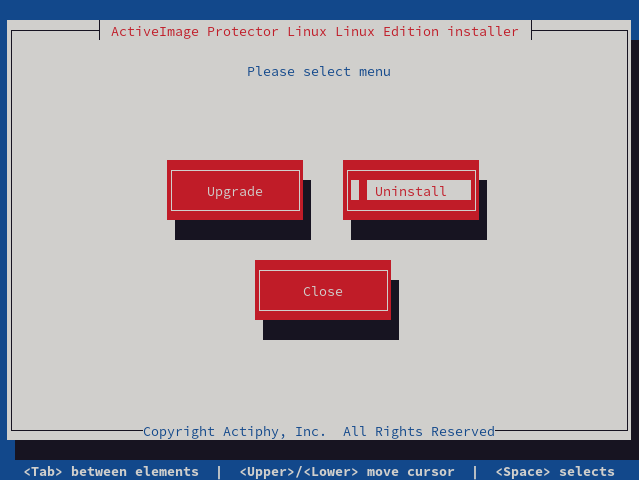
-
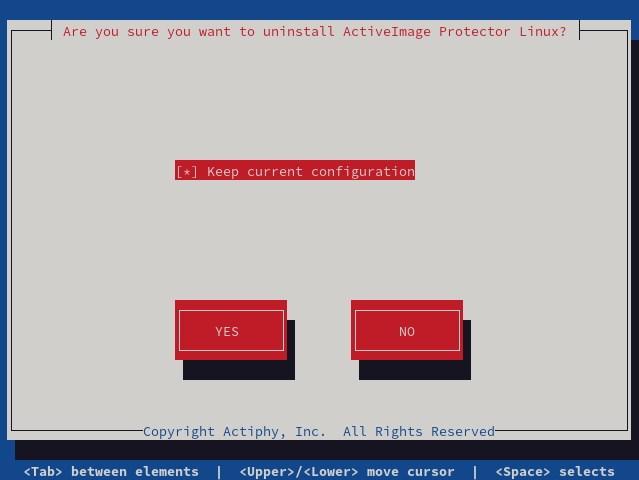
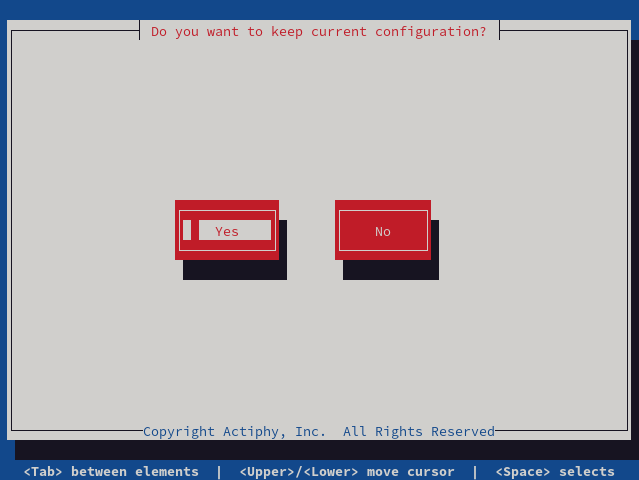
Please check in the checkbox for [Keep current configuration] option to keep the current settings for backup schedules, etc., after uninstallation, anc select [YES]. If you do not want to keep the current configuration, please uncheck the checkbox and click [Yes].
-
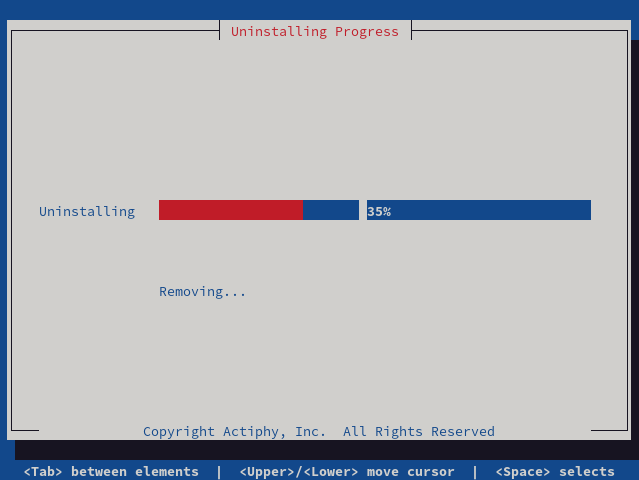
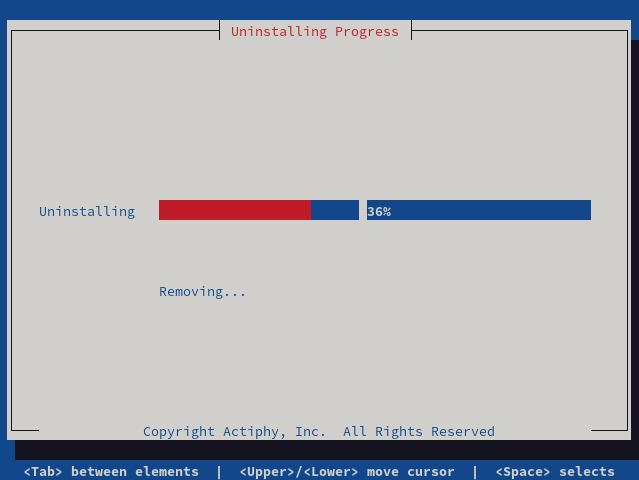
Un-installation progress is displayed. Please wait until the uninstall completes.
Upgrading
-
Install ActiveImage Protector and select [6] Install AIPLinux in [AIP-packages-tool] window, and the terminal window launches to display Install window. Select [Upgrade].
- If not root user, log in as super user and run the script [AIP-packages-tool] on root directory in the product media in terminal.
# su
Enter password for root user.
# <Mount point in the product media>/AIP-packages-tool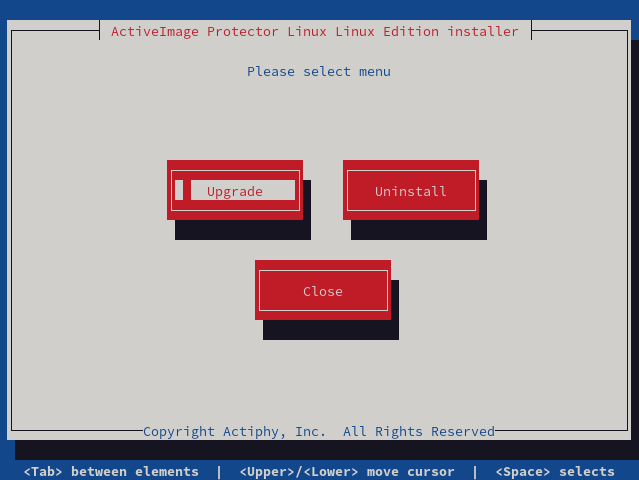
-
Please select [Yes] to keep current configuration and backup schedule settings after upgrading, please select [YES].
-
Uninstallation is started. Please wait until uninstallation process completes.
-
Please check the product key and select [Next].
-
Please read the terms and conditions of the end user license. Please select [AGREE] to continue installation of the product.

-
Please select the components and options to install and select [Install].
-
The installation starts. Please wait until installation process completes.

Product Activation
After trying activation methods in the following order, the product activation is performed by using one of the following operating procedure.
- Activation using the License File
- Use Access Actiphy Authentication Service (AAS) that’s deployed in the domain
- Access Actiphy Activation Server to on-line activate the product
Go to [Help] - [License] to check the activation status.
It is important to activate after installation rather than waiting for an extended period of time to avoid the backup operation to become disabled.
To discover AAS for the product activation, please run the following from the command line.
aipcontrol config AASIP <ip>
License File
When a license file is issued, AAS activation or online activation performed from the agent on a remote computer using the same product key is not supported. You need to issue license files respectively for the computers on which agents using the same product key are running.
Please note that the license file request URL is specific to the computers using the license file.
Change Activation Key
Go to [Help] - [License] and check the current activation procedure.
-
Online Activation
Go to [Online Activation], enter the product key to change and click [Activation].
-
AAS Activation
Launch [Actiphy Authentication Service (AAS)] window, enter the product key to change and click [Activation].
-
Use the License File
Launch [Activate using license file] window and click [Cancel license file]. Then, issue and register another license file again by using the product key to change.
Consuming Licenses
The product licenses are consumed as follows.
When the number of consumed licenses exceeds the number allocated to the product key, you have to deactivate the consumed license for online license authentication.
When license bundle and license file are created by split license, enter the license restore code at the respective issue sites to restore the license, and recreate license bundle and license file by allocating the required number of licenses.
- Linux
Successful product activation consumes the product license.
If the number of activated instances exceeds the licensed number of instances
    You have to deactivate the instance on a remote computer.
    The deactivated tasks on a remote computer become invalid at the next activation.

When issuing a license file, please allocate one license. When two or more licenses are allocated, the license file is not valid in other environment.
{: .alert .alert-info }
Before Using ActiveImage Protector
After installing ActiveImage Protector, it is recommended to create and ensure that the ActiveImage Protector Boot Environment boots up.
Use the following operating procedures to build boot environment.
-
Build LinuxBE by using ActiveImage Protector Go to [Utilities] and build boot environment (iso file).
-
Build RescueBoot by using ActiveImage Protector
Build boot environment selectable from grub by using LinuxBE. Go to [Dashboard] - [System Health Status] and click [RescueBoot] switch to build boot environment.
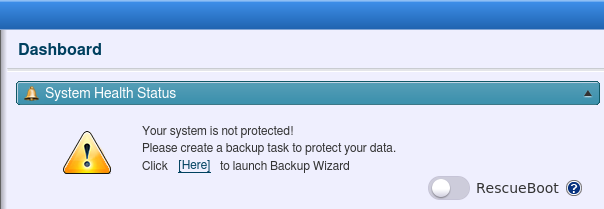
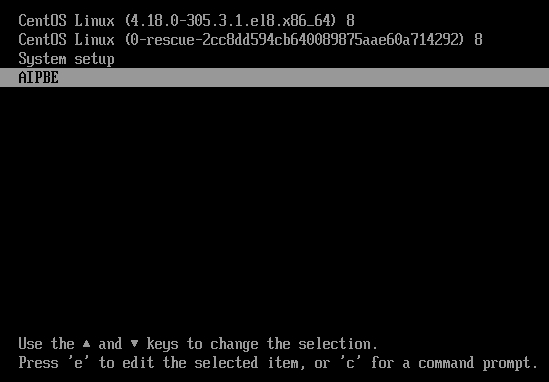
When the boot environment is successfully built, the switch is colored in green. Select [AIPBE] from grub when the system starts up, so that [Actiphy Boot Environment] boots up.
To disable the boot setting for the boot environment, click on the switch. The switch will gray out and AIPBE will not be displayed in grub when the system starts up.
The system environment where mdraid is configured is not supported.
-
Build one-time RescueBoot environment accessible by using RDP
Build boot environment selectable from grub and accessible by RDP and by using LinuxBE. Enter the following command in command interface (/opt/Actiphy/aipcontrol).
rescueboot runonce
After restarting the system, AIPBE will be automatically selected only once in grub and Debian12 window is launched. Then, RescueBoot environment is accessible by using RDP.
You do not need to enter password to access a cloud instance except for Google Cloud by using RDP. Before you try to access Google Cloud by using RDP, please contact Actiphy Support Service. When accessing boot environment configured on cloud instance (AWS EC2 / Azure / Oracle / Google), open TCP port 3389 as security group used by the instance and enter < "public IPv4 address" > by using RDP and access boot environment.
When disabling boot setting for boot environment, click on the switch. The switch will gray out and AIPBE will not be displayed in grub when the system starts up.
The system environment where mdraid is configured is not supported.
Install remote console
-
Double-click Setup.exe and start the installer.
-
Select install type.
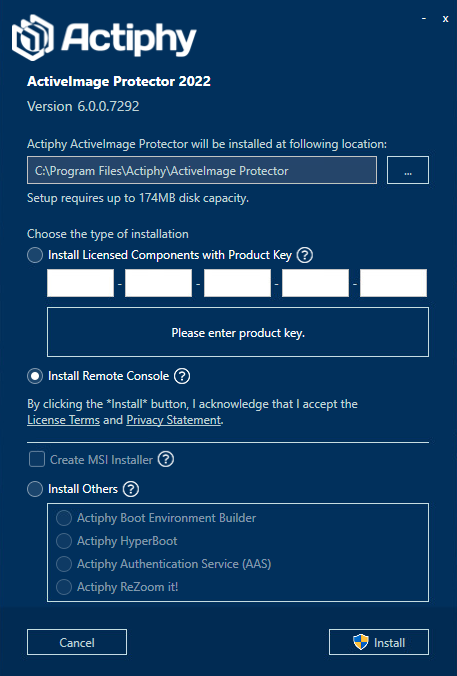
- Install remote console
Please select this type, because the operation is proceeded by connecting to backup agent configured on Linux system.
- Install remote console
-
Select the type and click [Install].