Life Cycle Management of Agent
Use the Push Install feature for life-cycle management of Agents. Please make sure that the following security settings are configured for the computers.
-
Firewall Setting [File and printer sharing] is allowed.
- Configure firewall settings for Group Policy [Allow inbound file and printer sharing exception] option is enabled in [Network]
- [Network Connection] - [Windows Firewall].
-
Use one of the following procedures to launch Operation dialog.
-
Menu Bar: [Operations] - [Client Push Install]
-
Control Button: [Push Install]
-
Right-click menu on a managed client: [Push Install]
-
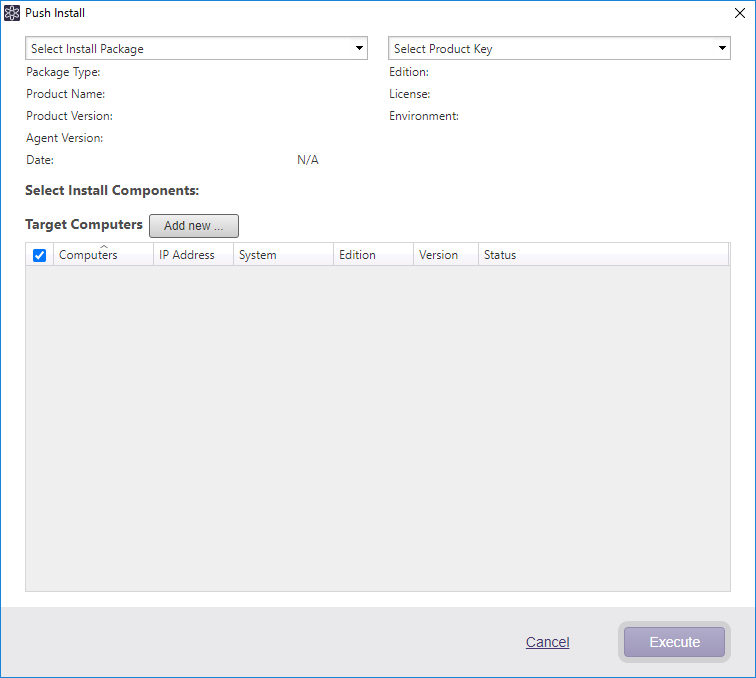
## Push Install
-
Select the package and product key to install. [Add new…] may be used to add the package and product key to the list.
Setup file for agent version 6.0.0.7292 or later are supported. Only the product key for Version 2022 only is valid.
Using the MSI installer created from an ActiveImage Protector 2022 setup, the product key needs to be specified. The key is used for the processing.
Cloud license’s product key does not enable Push Install.
Linux Edition does not support Push Install.
-
Select the components to install.
When changing the component of agent while the same version is already installed, after uninstallation of the agent from the computer, the agent configured with the selected components is installed.
-
Check the computers to install a package. [Add new…] may be used to add a computer to the list.
-
Click [Run] to start installation.
When installing a package on a virtual machine using a Virtual (Guest) key
-
Specify Virtual (Guest) key to use as the product key.
-
Specify the hypervisor on which the install target virtual machine is running. Every virtual machine configured on the hypervisor is listed.
-
Specify the appropriate Virtual (HyperAgent) key. When the key is entered, the connection to Actiphy Activation Server or available Actiphy Authentication Service (AAS) is established and the key is allocated to the hypervisor.
AAS must be working in Server Mode. AAS in Proxy Mode is not available.
When the number of instances of ActiveImage Protector Virtual (HyperAgent) activated with Virtual (HyperAgent) key exceeds the licensed number, you’ll need to cancel the registered hypervisor which the license is allocated.
-
Select the installation target virtual machine.
The installation target virtual machine must be running.
The installation target virtual machine must have IP address. When [IP address] is blank, please enter.
-
When the installation process starts, you will be prompted to enter the credential information.
Even when the installation target virtual machine joins domain, you need to enter the credential information.
Even when selecting multiple virtual machines, you have to enter credential information only once. In the event a computer requiring different credential information is included, please try again.
After installation, local computer name, instead of the name on hypervisor, is added on the client list.
Push Install
-
Select [Uninstall] for selection of install package.
-
Please check the computers to uninstall the product. Click [Add New] to add a computer.
-
Click [Run] to start the uninstall.
Push Upgrade / Update
-
Select the package to install or patch file.
The supported Setup file and patch files includes Version 6.0.0.7292 or later agent. The supported product key is Version 2022 only.
When upgrading from Version 2018 to Version 2022, please specify Version 2022 product key.
-
Select components.
When push installing patch file, you cannot select components.
-
Check the computer to run upgrading or updating the product. You can add a computer by selecting [Add New].
-
Click [Run] to start upgrading or updating.