Site Configuration
Configuration settings for ActiveVisor agents and console.
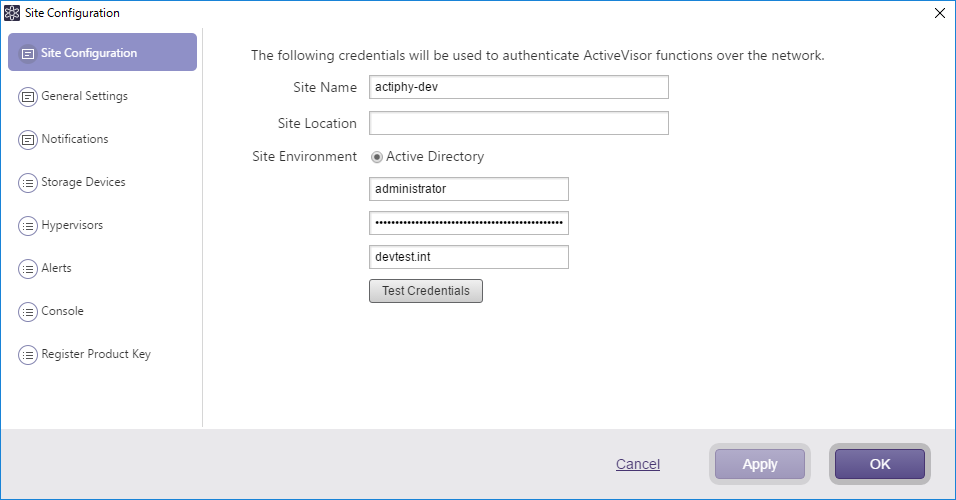
Site Configuration
Edit the configured initial settings.
General Settings
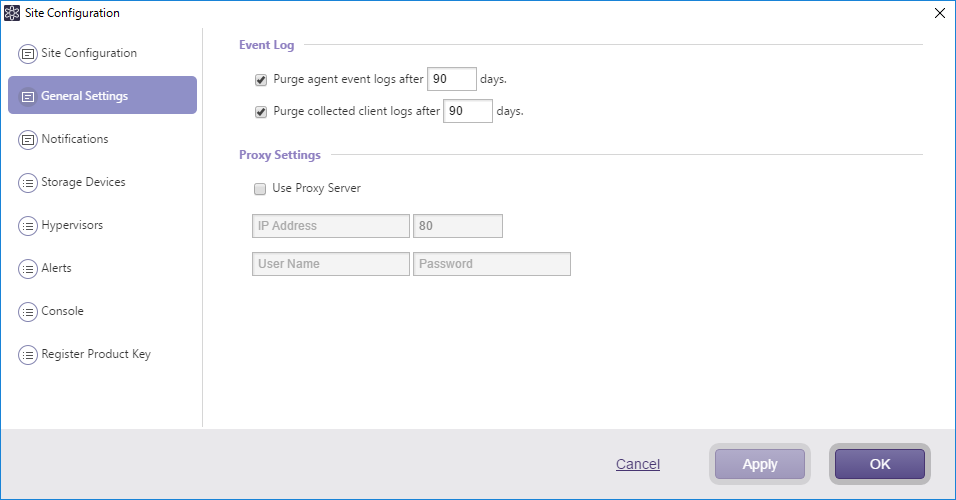
Configure the settings for the ActiveVisor agents.
-
Event Log
-
Purge agent event logs after xx days.
The event log information of the agent (ActiveVisor) is stored for a specified number of days, and will then be purged. -
Purge collected client logs after xx days
The log information obtained from the clients (ActiveImage Protector) and are saved for a specified number of days and is then purged.
-
-
Proxy Setting
- If using a proxy server for internet access, select this option and configure the settings. When communication with Actiphy’s activation server fails, the ActiveVisor update fails.
Notification
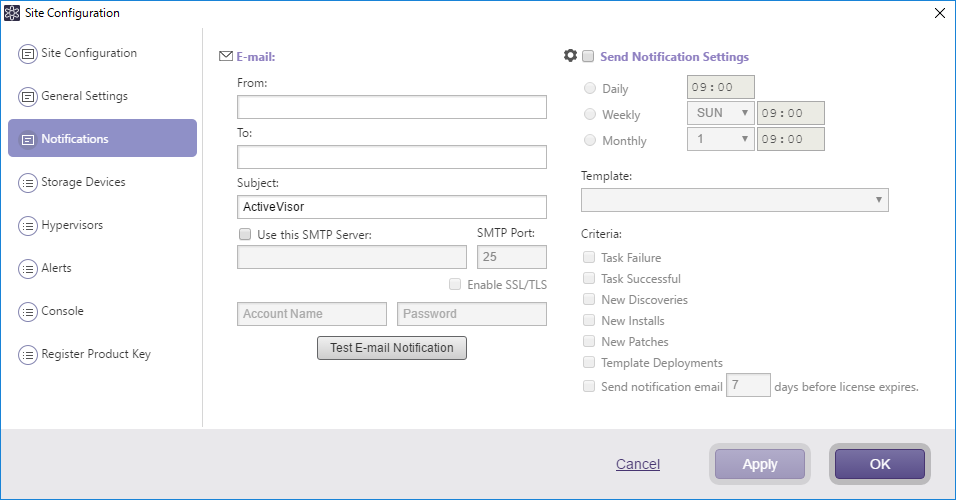
Configure the settings for ActiveVisor to send email notifications.
-
Use this SMTP Server
Enable the [Use this SMTP Server] option to use a specified SMTP server for email notifications. If this option is not selected, email notifications are sent without using SMTP server. -
Send task summary
Select this option to send ActiveVisor event summary mail according to the schedule you specify. -
Template English (Concise), English (Detailed) and English (HTML).html come standard with [Template].
-
Concise Only occurred events are notified by email.
-
Detailed The all configured events are sent via email notifications.
For example, when all the backup tasks complete successfully and if [English (Concise)] is selected, only the events of the successfully completed tasks are sent via email notification. As a result, the events of passed tasks or other information notifications are not sent. If [English (Detailed)] is selected, the information other than successfully completed tasks are sent via email, in which case only the mail title with an empty mail body is sent.
- HTML Concise HTML.
-
Storage Device

Register the network shared folders to save the backup templates.
Click [Add Device] to add a specific shared folder.
Click [Update] to provide updated status information.
Check the unnecessary devices and click [Remove from list] to remove them.
If ActiveImage Protector backup tasks are created on the managed agents, the shared folders specified as the destination for the tasks are automatically registered.
Hypervisor
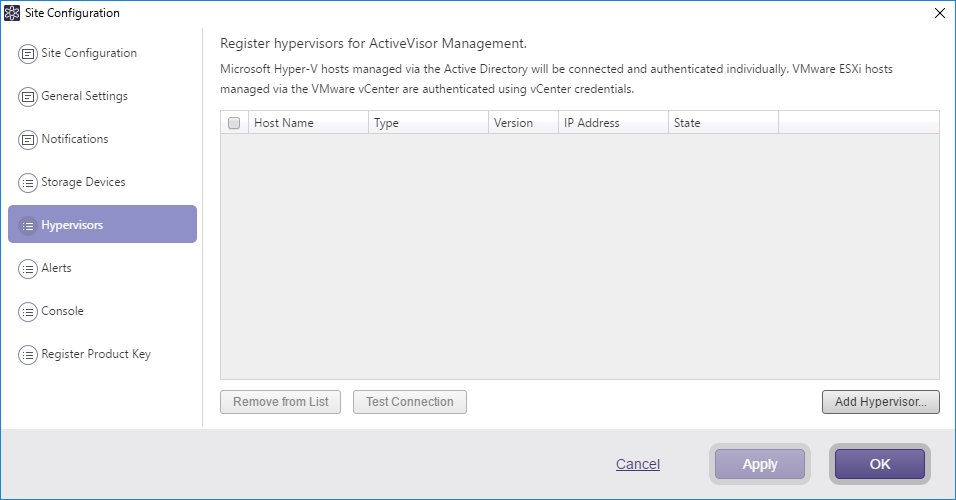
Register the hypervisor for use in ActiveVisor by selecting [Site Configuration]. The other hypervisors may be added by selecting [Add Hypervisor].
Select a hypervisor type from the pull-down list, enter credential information to communicate with the target host and click [OK].
- To add Nutanix Acropolis, specify CVM for the target and enter credential information for Prism.
When the connection is successfully established, the hypervisor is added to the list. After adding the hypervisor, click [Test Connection] to confirm the connection.
Check the unnecessary hypervisors in the list and click [Remove from list] to remove them.
If ActiveImage Protector’s vStandby tasks are created on the managed agents, the hypervisor specified as the target host for the task are automatically registered.
Alert
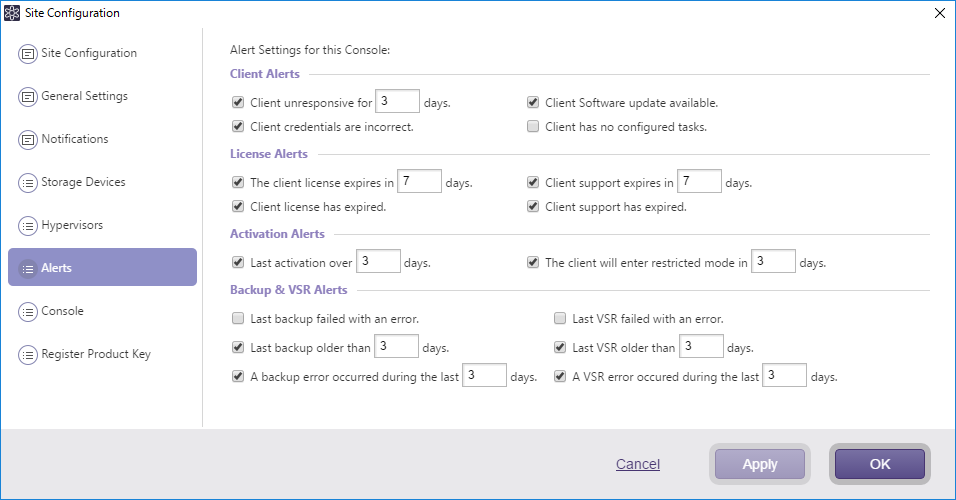
Configure the settings for Alerts in the [Client] tab.
-
Client Alerts
Configure Alerts settings for clients. -
License Alerts
Configure Alerts settings for the license status of agents. -
Activation Alerts
Configure Alerts settings for the activation status on agents.
“Restricted Mode” means that in the event that an MSP / subscription license is used, after a predetermined period from the last activation, some of ActiveImage Protector features are no longer available. When activated, the features re-enabled.
- Backup & VSR Alerts
Configure Alerts settings for the backup and vStandby tasks on clients.
Console
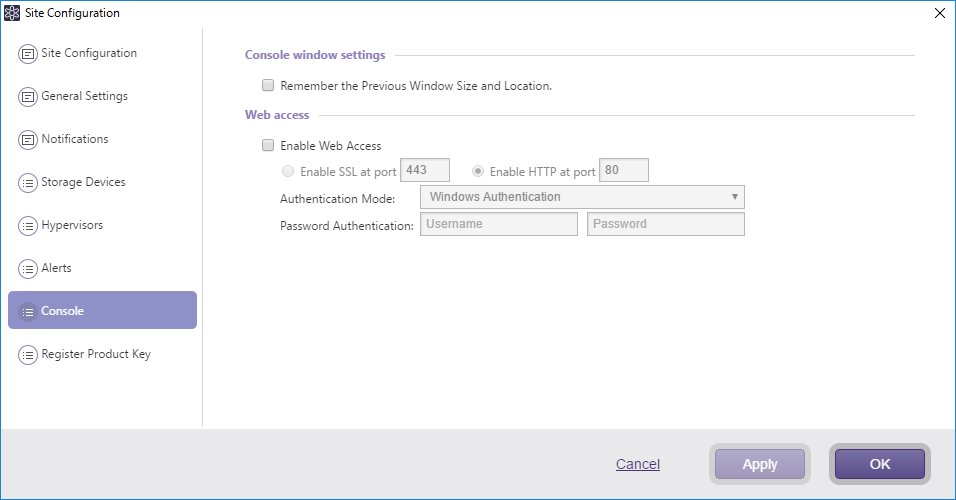
Configure the settings for the ActiveVisor console.
-
Console Window Setting
The [Remember the previous window size and location] option is provided. -
Web Access
Enable this option to operate ActiveVisor via web browser.
Please specify the port to use for web access and authentication mode.-
Windows authentication Enter the credential information to login Windows.
-
Password authentication Enter the specified User ID and password for access authentication.
For more details about supported web browsers, please refer here.
-
Web Access
After configuring the above setting, launch a web browser and enter the host name which ActiveVisor with web enabled access runs on or use the IP address in the address bar [URL] to establish the connection.
To access ActiveVisor via Web browser, please configure firewall setting on the host which ActiveVisor runs on and allow access to the specified port.
-
When SSL is disabled.
http://
If you changed the port number other than “80”, please postfix “
" at the end of the above. -
When SSL is enabled.
https://
:443 If you changed the port number from “443”, please specify the changed port number instead of “443”.
Register Product Key

Register the product key to use for push install.
A new product key may be added by selecting [Register New Product Key].
Check the unnecessary keys and click [Remove from list] to remove them.
The product keys used for the managed clients are automatically registered.