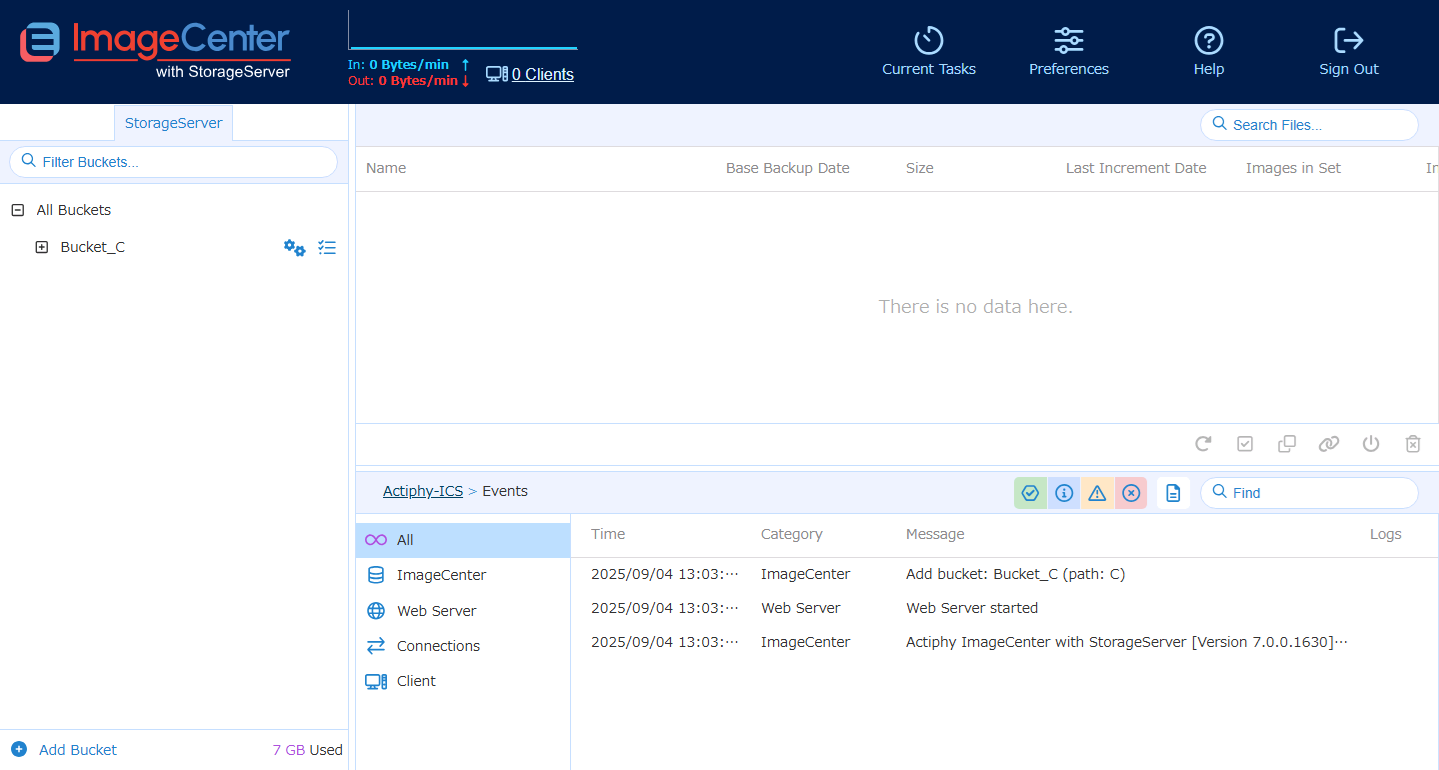
Dashboard
The Dashboard provides an intuitive display providing real time monitoring information.
Network communication, Status
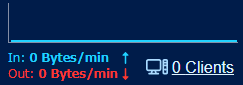
The current communication status (received and transmitted data volume) and the number of the connected clients is displayed.
By clicking on the received / transmitted data volume, you can select the display format [bits / sec] or [bps].
Click on the number of the connected clients. You can monitor the information for the respective connected clients.
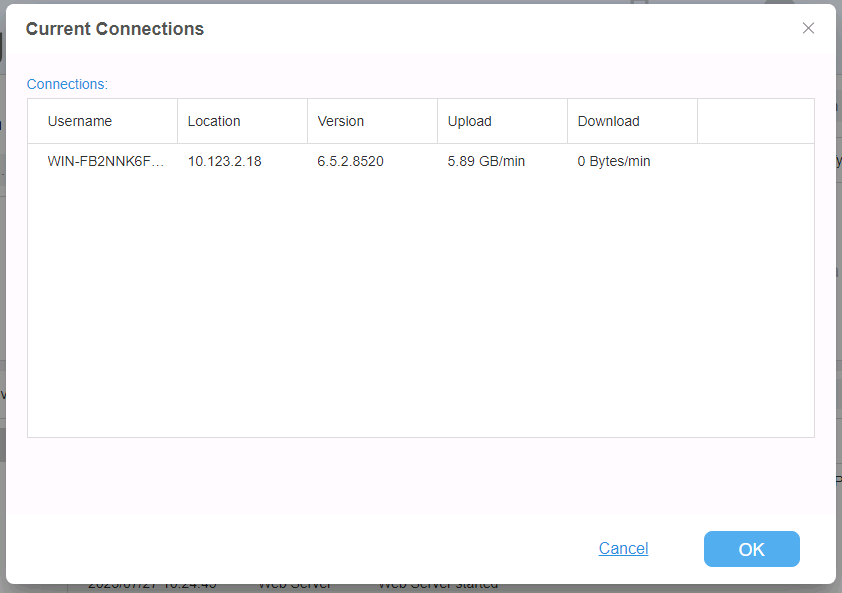
The received / transmitted data volume from / to ActiveImage Protector and the received data volume from Actiphy ImageCenter (with StorageServer) and Actiphy StorageServer are displayed.
Bucket Tree
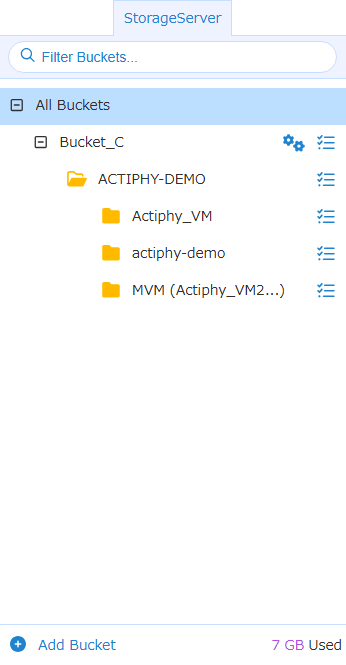
Selecting StorageServer tab, you can create and manage a bucket. The following items are displayed on the tree.
-
All Bucket
The created buckets are displayed. When connection to ActiveImage Protector client is established, the created buckets are displayed. Expand this item and the client alias is displayed. -
Client Alias
ActiveImage Protector client alias which the backup task was executed.
Ex: ACTIPHY-DEMOExpand this item and image aliases are displayed. Right-click on the unnecessary items to delete after deleting every image sets.
-
Image Alias Backup image alias is displayed. Selecting the alias, the images are listed in the right pane. You can select to run one-time operation for an image in the right-pane. For more details, please refer [here] (onetime_task.html).
-
Alias of agent-based backup images Client name for which [Volume Backup] was performed. Ex: actiphy-demo
When enabling [Split image into xx MB files] for a single disk or multiple disks, the created image files are displayed as follows in right pane. The number underlined in red indicates the disk number while the number underlined in blue indicates the generation.
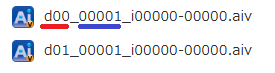
When disabling [Split image into xx MB files] for multiple disks, the created image files are displayed as follows in right pane. The number underlined in red indicates that multiple disks are included in the image file while the number underlined in blue indicates the generation.

-
Alias of HyperBack image [HyperBack] backup source virtual machine name is displayed. Ex: Actiphy_VM
The image file is indicated as follows in the right pane. The number underlined in red indicates a virtual machine while the number underlined in blue indicates the generation.

When multi-virtual-machine (MVM) image is created, [MVM (virtual machine name…)] is displayed. Ex: MVM(Actiphy_VM2…)
The image file is displayed as follows in the right pane. The number underlined in red indicates the multiple virtual machines are included in the image file while the number underlined in blue indicates the generation.

-
Right-click on the unnecessary items to delete them after deleting every image sets.
Bucket / Client Alias task:
It operates including aliases in lower-level layers. When an alias in a lower-level hierarchy configures a task, it will be ignored.
Client Alias / Image Alias Task:
The task configured with the respective alias runs. To exclude from the upper-level alias task, configure the tasks for the respective alias or enable [Do not inherit tasks from the parent folder] option for the alies task settings.
Create New Bucket
Click [Add new bucket] to add a new bucket.
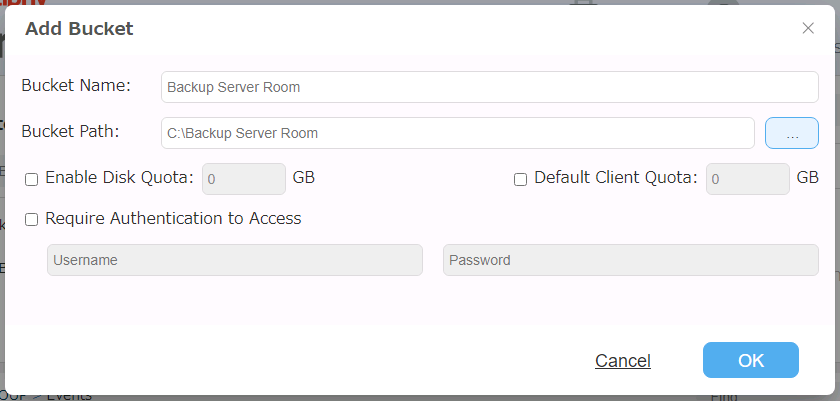
Please configure the following settings for the new bucket:
-
Bucket Name Bucket name is displayed when the connection from ActiveImage Protector client to StorageServer is established. A folder defined with this name is created in bucket path.
When a bucket is created without defining the bucket name, the new bucket is created under the name “Bucket_
"." -
Bucket Path
Please specify the path of the location to configure the bucket.When the bucket is created without specifying the path, the bucket is configured in the path specified by selecting [Preference] - [Storage].
-
Enable Disk Quota Please specify the maximum limit of the disk space allocated to the disk.
When the used disk space exceeds the limit while running the backup task for ActiveImage Protector client, the backup process continues.
When the backup task starts while the used disk space exceeds the limit, the backup task for ActiveImage Protector client fails in Error -800. -
Default Client Quota
Please specify the maximum limit of the disk space allocated to the new client.When the used disk space exceeds the limit while running the backup task for ActiveImage Protector client, the backup process continues.
When the backup task starts while the used disk space exceeds the limit, the backup task for ActiveImage Protector client fails in Error -802. -
Require Authentication to Access
Enable [Require Authentication to Access] option to request for authentication before accessing a client.
Bucket / Folder Task
Click  button and the task setting dialog will be displayed and you can configure the task setting.
For more details, please refer here.
button and the task setting dialog will be displayed and you can configure the task setting.
For more details, please refer here.
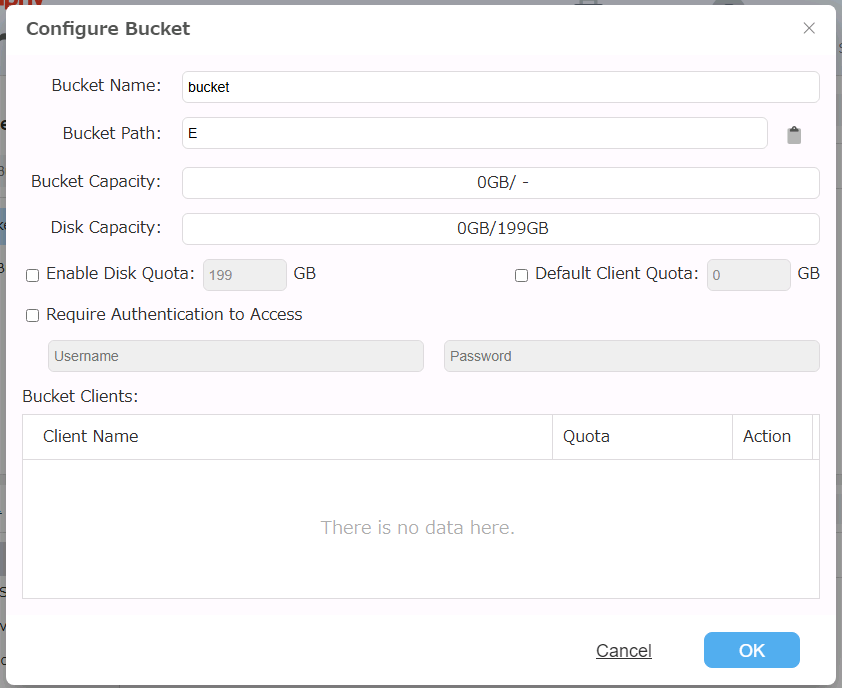
Configure Bucket
Click  button to display the bucket settings dialog as shown below.
-
Enable Disk Quota
Please specify the maximum limit of the disk space allocated to the bucket.When the used disk space exceeds the limit while running the backup task for ActiveImage Protector client, the backup process continues.
When the backup task starts while the used disk space exceeds the limit, the backup task for ActiveImage Protector client fails in Error -800. -
Default Client Quota Please specify the maximum limit of the disk space allocated to the client after the first time the connection was established.
The settings are applied to the client which is registered after configuring the settings. Please change the settings respectively for the existing and registered client.
-
Require Authentication to Access
Enable [Require Authentication to Access] option to request for authentication before accessing a client. -
Bucket Clients The information of the clients registered with the bucket is displayed. You can specify the maximum limit of the quota allocated to the bucket.
When the used disk space exceeds the limit while running the backup task for ActiveImage Protector client, the backup process continues.
When the backup task starts while the used disk space exceeds the limit, the backup task for ActiveImage Protector client fails in Error -802.To remove the quota setting, reset it to “0”.
Client information may be deleted only after deleting every image sets.
Shared Folder Tree
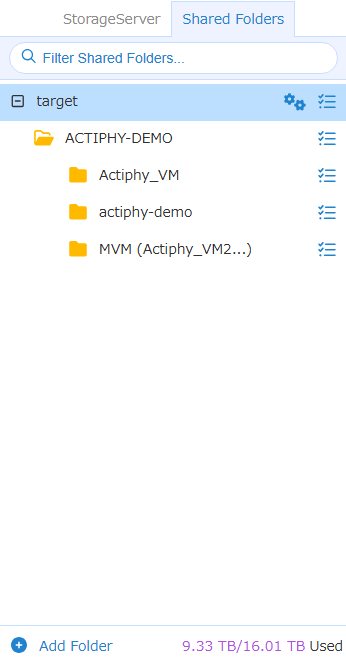
Go to [Preference] - [Storage] and enable [Manage the storage except for the bucket on StorageServer], add a folder and Shared Folder Tree is displayed. The following items are displayed in the tree.
-
Shared Folder This folder is specified when added. When the added folder contains subfolders, they will also be displayed. If there are images in the root of these folders, when selecting, the images will be listed in the right pane.
-
Client Alias ActiveImage Protector client alias of which backup tasks are executed saving the backups in this bucket.
Ex: ACTIPHY-DEMOA uniquely named folder, if any, created when running backup task is displayed. Expanding this item displays image alias.
-
Image Alias Image alias based on the image type will be displayed. When selecting this alias, the images are listed in the right pane. You can select one-time image operation for an image in right-pane.
For more details, please refer [here] (onetime_task.html).-
Alias of agent-based backup images Client name which [Volume Backup] was performed.
Ex: actiphy-demoWhen enabling [Split image into xx MB files] for a single disk or multiple disks, the created image files are displayed as follows in right pane. The number underlined in red indicates the disk number while the number underlined in blue indicates the generation.
When disabling [Split image into xx MB files] for multiple disks, the created image files are displayed as follows in right pane. The number underlined in red indicates that multiple disks are included in the image file while the number underlined in blue indicates the generation.
-
Alias of HyperBack image
[HyperBack] backup source virtual machine name is displayed.
Ex: Actiphy_VMThe image file is indicated as follows in the right pane.
The number underlined in red indicates a virtual machine while the number underlined in blue indicates the generation.When multi-virtual-machine (MVM) image is created, [MVM (virtual machine name…)] is displayed. Ex: MVM(Actiphy_VM2…)
The image file is indicated as follows in the right pane.
The number underlined in red indicates that multiple virtual machines are included in the image file while the number underlined in blue indicates the generation.
-
Add Folder
Click [Add Folder] to add a shared folder.
Folder Setting
Click button and you can change the display name on the tree in Folder Setting dialog.
Folder Task
Click button to display the task setting window. Please configure the task settings for the items displayed in task setting dialog.
For more details, please refer here.
Current Task
Currently running tasks are listed. Select a task respectively to cancel.
Event
The respective events are displayed.
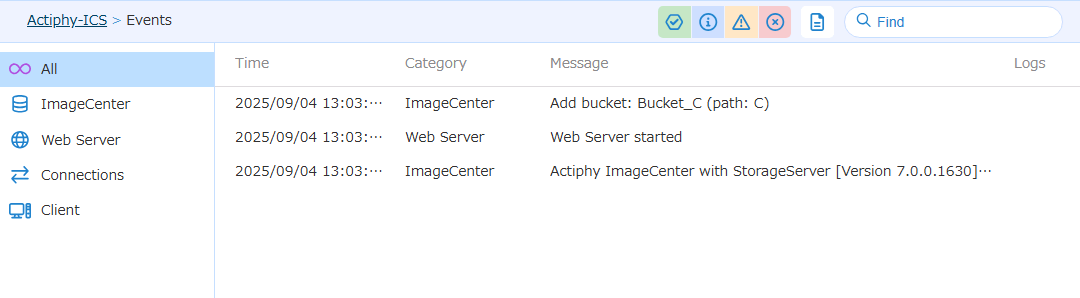
The item type to display can be selected in  .
.
Items with task logs can be monitored in log column  .
.