Create File Backup task
Select a managed client computer in [Client] view, and go to [Create Task] - [Backup] - [File Backup] in the right-click menu.
Source
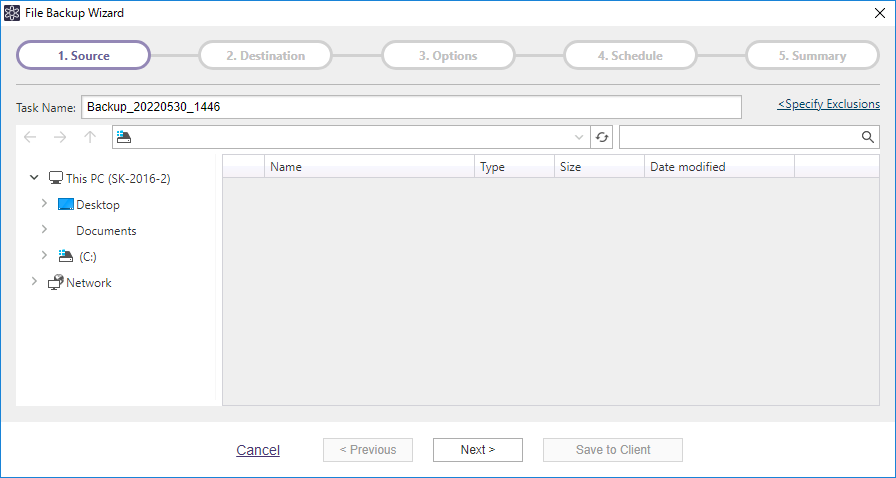
Select a backup source file / folder.
File Backup of Desktop edition does not support the items in network shared folder.
Snapshot is not used for backing up the items in network shared folder, so that the backups are taken at the point in time when performing the process for the respective files.
When configuring the settings for Excluding Items, please specify as follows. When disabling the configured settings for Excluding Items, please uncheck the unwanted items.
-
File
When excluding specific files only, please specify the file name including the file extension. Ex: EULA.txt
When excluding files with specific extension only, please use wild card “”. Ex:.txt
When excluding files of which file name includes specified character strings, please use wild card “”. Ex:EULA.
-
Folder
Please specify the full path for the folder.
Ex:C:\Windows\Temp
After configuring the settings, click [Next].
Destination
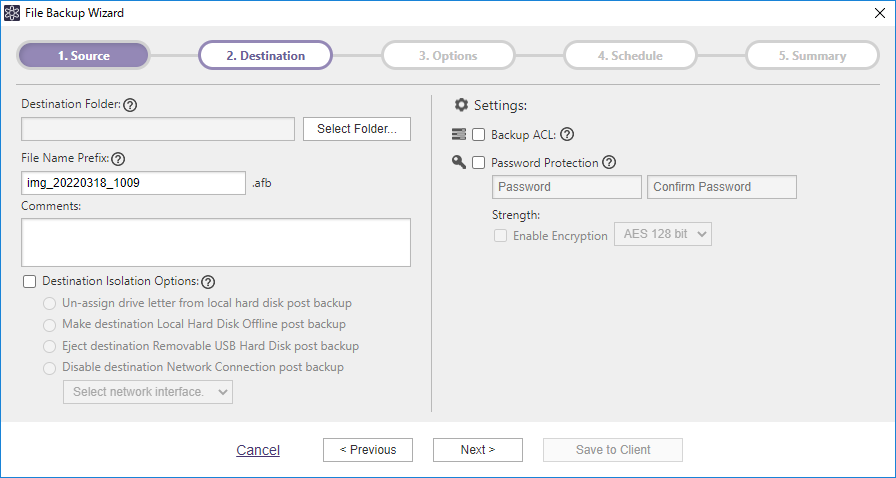
Select a destination storage and configure the settings.
-
Destination
Select a destination storage and configure the settings.If the device and media are not configured for tape pool on the target agent, the tape pool cannot be specified as the destination saving the creating backups.
-
File Name Prefix
Specify the backup image file name to create. -
comment
Define comments for backup image files. -
Destination Isolation Options
Disconnects access to backup image storage drives after backups complete rendering the specified destination storage inaccessible. Upon completion of the backup task, the specified destination storage becomes inaccessible from agent. -
Eject destination data cartridge
When enabling [RDX data cartridge eject setting] in [Preference] - [General], the following are displayed instead of Destination Isolation option.-
Weekly : The cartridge is ejected for the last incremental backup task scheduled on the specified day(s) of a week.
-
Daily : The cartridge is ejected at a specified time after full or incremental backup. When the time comes to eject the cartridge during backup process, ejection of the cartridge is suspended.
-
When backup task completes : The cartridge is ejected after a full or incremental backup completes.
-
Not Eject: Do no eject the cartridge.
-
-
Back up ACL
When enabling this option, the backup source ACL will be backed up. When restoring, the backed-up ACL will be restored. -
Password
Password protect the backup by assigning a unique password. This ensures that password input is required for mounting, exploring, or restoring any of the contents of the backup.
There are three levels of encryption to choose from.
* RC5:An early encryption standard with a variable block size, key size and number of rounds. Selecting RC5 encryption provides a faster encryption processing speed.

* AES 128 bit / AES 256 bit : A stronger encryption method than RC5 with a fixed block size and a key size of 128 or 256 bits.
After configuring the above settings, click [Next].
Options
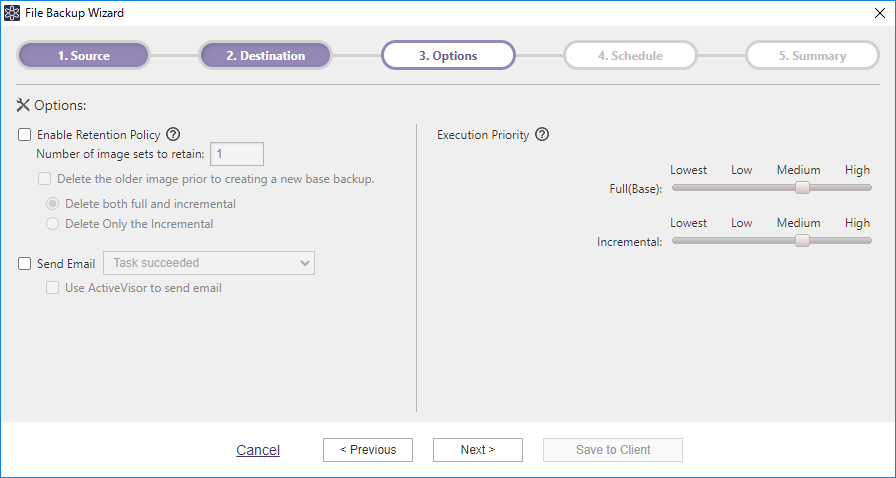
Select the required options.
-
Enable Retention Policy
Check this box to enable a retention policy as to how many sets of incremental backup files to retain before deletion. Image set includes a base backup and the associated incremental or differential backup. Select [Delete the older image before new base backup] option to delete the most obsolete image set before a new image set is created, when the number of image sets reaches the pre-defined limit. Select option to delete the most obsolete image set before a new one is created.-
Delete both the full and incremental: Select this radio button to delete both full and incremental backups based on the retention policy settings.
-
Delete only the incremental: Selecting this option deletes only the incremental backups based on the retention policy. Full backups are not deleted.
-
-
Send Email Check this box to send email notification of a task completed with a specified status. Predefine the email notification settings by selecting [Preferences] - [Notification] from the menu bar. Enabling [Use ActiveVisor to send email] sends email notification from ActiveVisor.
-
Execution Priority
Select a level of task Execution Priority.
When completing the settings, click [Next].
Schedule
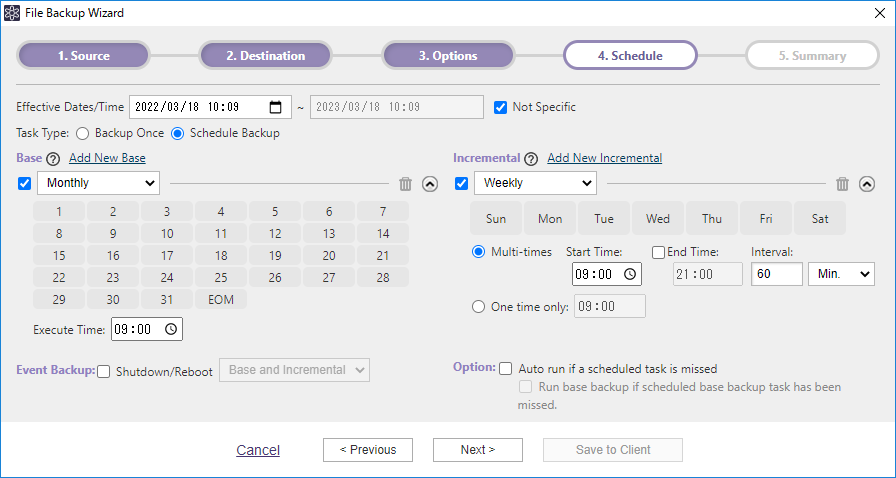
Configure the backup schedule settings.
-
Task Type
Please select [One-time Backup] or [Scheduled Backup]. When selecting [Scheduled Backup], please select the schedule type. -
Base
Check the box and use the drop down menu to select the schedule type. Options include [Weekly], [Monthly], [Specified Date/Time], [Designate Specific Days]. Uncheck the box to disable the schedule instead of deleting. Click [Add New Base] to add a new base backup schedule. Delete any unnecessary schedule types by emptying the recycle bin. -
Incremental
Select a schedule type from the drop-down box. The schedule options are [Weekly], [Monthly] and [Designate Specific Days]. Uncheck the box to disable the schedule instead of deleting. The following options may be selected for incremental backup tasks.-
Multi-times:Please specify the time slot and interval to run recurring backup tasks. If not specifying [End Time], the incremental backup tasks regularly run until the specified time on the following day.
-
One time only:Specify the execution time.
Clicking [Add New Incremental] to create an additional schedule. Delete any unnecessary schedule types by emptying the recycle bin.
-
-
Event Backup Check the box for the [Shutdown / Reboot] option to enable event-triggered backups so the backup task is started upon system shutdown or restart.
-
Option
Auto run if a scheduled task is missed. By enabling this option, a skipped task at system shutdown if any, is automatically executed when the system is rebooted.
Summary
Use the Summary window to review the backup configuration and options.
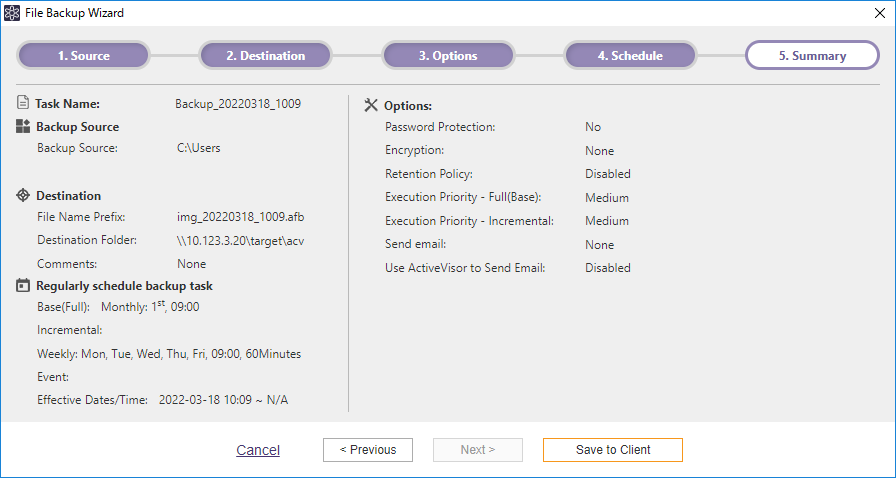
Use the Summary window to review the backup configuration and options. Click [Save to Client].
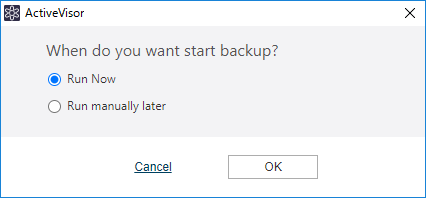
When One-time Backup is selected
Select [Run Now] or [Run manually later] to start backup.
Edit Task
You can edit the task from the following.
| View | Access Method |
|---|---|
| Client | Select a managed computer and click [+] or double-click to expand the detailed information and select a task on the [Tasks] tab. |
| Task | Select a task and click [+] or double-click to expand the detailed information and select the respective settings in the left pane. |
| Destination | Select a task and click [+] or double-click to expand the detailed information and select the respective settings in the left pane. |